
Generating a Return Shipment
If a return shipment hasn’t been created for a claim in the Corso app, you can simply create one for your customer right within the Corso admin, making sure to resolve their claim as quickly as possible.
Quick Ship
Section titled “Quick Ship”Quick ship is the quickest way to provide a return label to your customer. By clicking Quick Ship, you have the chance to quickly review the To and From address before generating the label. Quick ship can only be set to one default location, and can be changed within your Return Locations in Shipping Policies.
Steps to Quick Ship
Section titled “Steps to Quick Ship”Creating Custom Shipments
Section titled “Creating Custom Shipments”If you need to generate a more custom shipment where you can change the To or From address, adjust weight, and choose your rate, you can create a custom shipment.
Steps to Creating a Custom Shipment
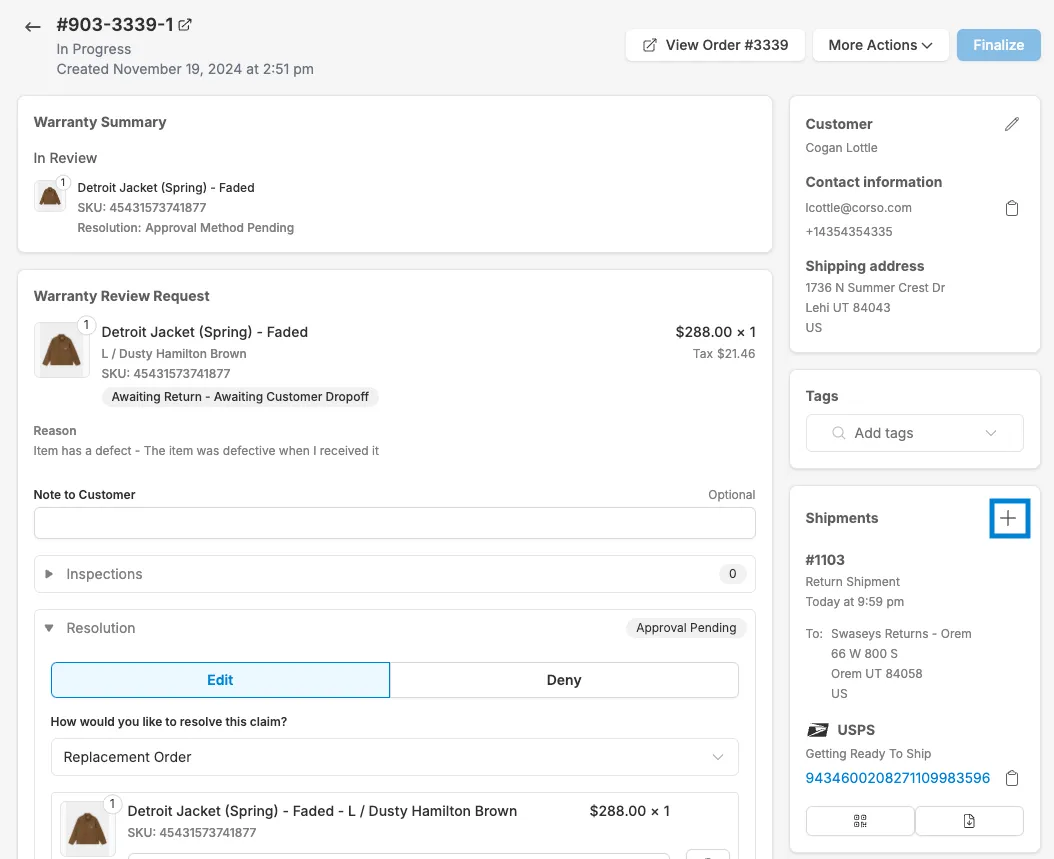
Section titled “Steps to Creating a Custom Shipment”- Click the ’+’ in shipments
-
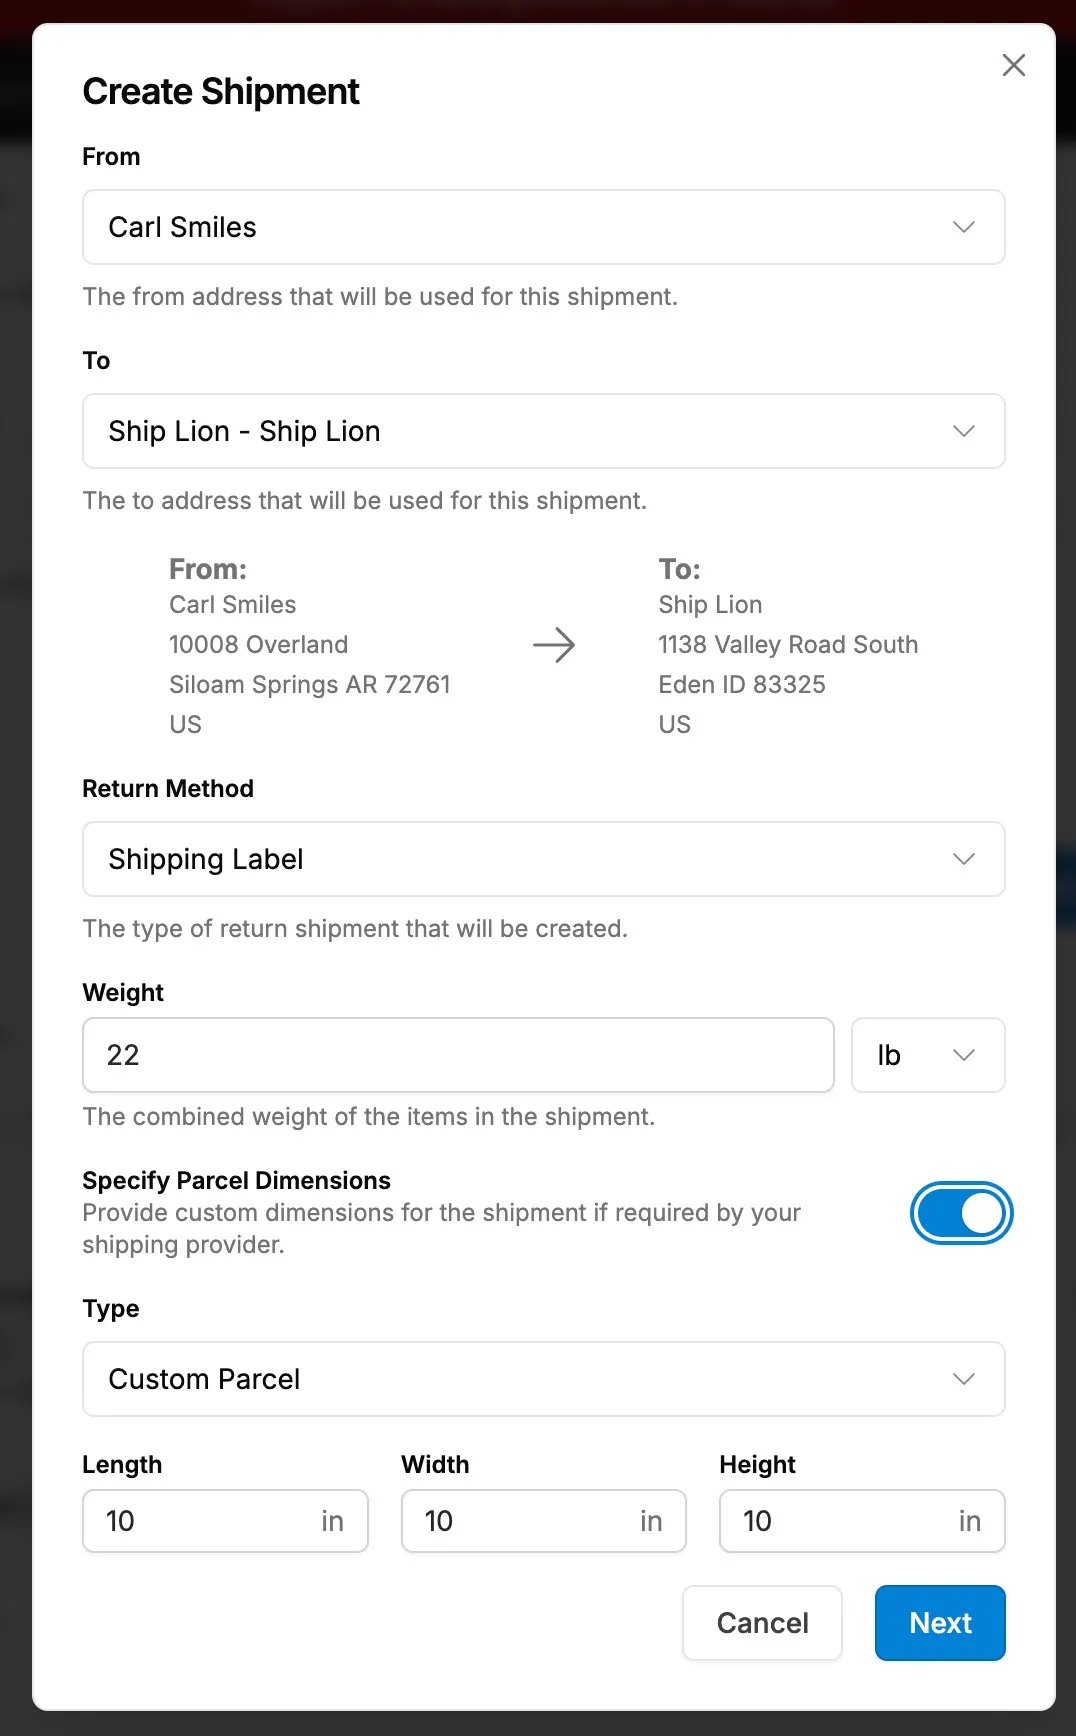
Create the Return shipment.
Set the From and To locations to any locations saved in your Policies or the customer’s location.
Then, choose a return method from the Return Method dropdown. Three options are available:
-
Shipping Label — Enter the combined weight of the items in the shipment and select the unit — either oz or lb — from the dropdown next to the weight field. If your shipping provider requires package dimensions to return accurate rates, enable the Specify Parcel Dimensions toggle. When enabled, select a predefined parcel type from the Type dropdown or enter custom values in the Length, Width, and Height fields (measured in inches). Leaving the toggle off fetches rates using weight alone.
-
Packing Slip — Generates a packing slip for the return without purchasing a shipping label.
-
Happy Returns — Available when your store has the Happy Returns integration enabled and the customer’s shipping address is in the United States. Selecting this option generates a QR code the customer can use to drop off their return at any Return Bar location. No box or label is needed. The From and To address fields are not shown for this method; the destination is always Happy Returns Return Bar®.
-
-
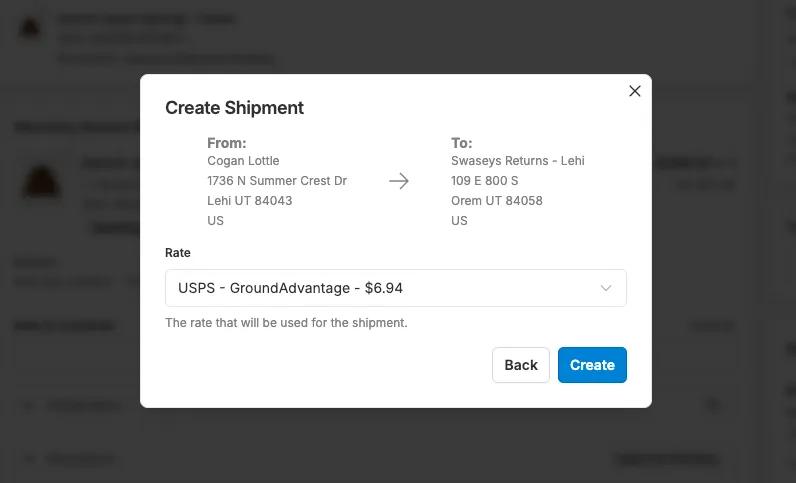
Select the rate you’d like to be used for the shipment, and click Create.
For Shipping Label shipments, rates are shown on the next step. For Packing Slip and Happy Returns shipments, clicking Create finalizes the shipment immediately.
-
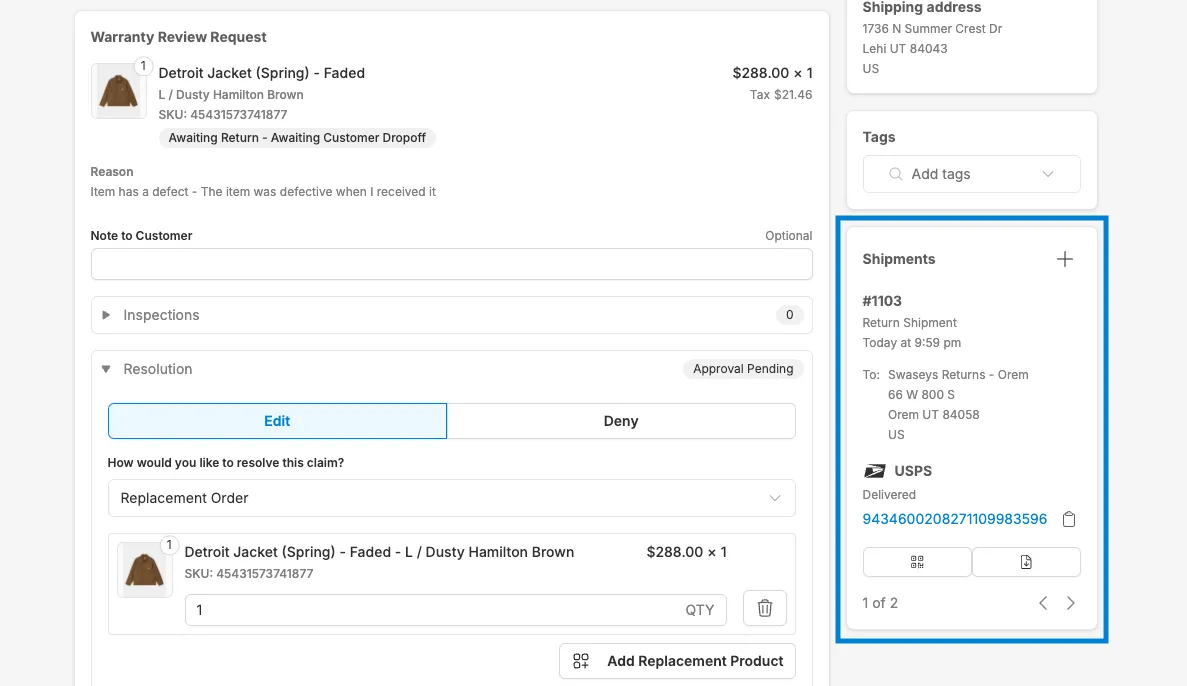
View the generated return shipment in the claim view.
Here you can download the QR code, Shipping Label, or Packing Slip depending on what method you provided the customer.
For Happy Returns shipments, the claim view displays the Return Bar QR code, the confirmation code, and options to copy the confirmation code or download the QR code.
Click the tracking number to be directed to the tracking page for the return shipment.
If there are multiple shipments for the claim, you can click through the different labels available.
Customers will be able to view their return shipment in the Customer Portal when looking up the order by Email/Postal Code and Order number.