Processing Warranty Claims
When a warranty claim comes in, this page gives your team one place to review the request, update the details, choose the right resolution, and finalize the outcome. If you are moving quickly, think of the page in three parts: the claim header, the summary, and the request workspace.
Start with the claim header
Section titled “Start with the claim header”The header keeps the claim-level actions close at hand:
- Click the confirmation number to jump straight into the customer request.
- Review the claim status and when the request was created.
- Open More Actions when you need to take a step before resolving the claim.
- Click Finalize once the request is fully reviewed and ready to close.

Use Warranty Summary for the quick read
Section titled “Use Warranty Summary for the quick read”The Warranty Summary gives you the fast answer before you start editing anything. This is where you can quickly confirm which product is under warranty review, which item is being worked, and whether a resolution has already been approved or denied.
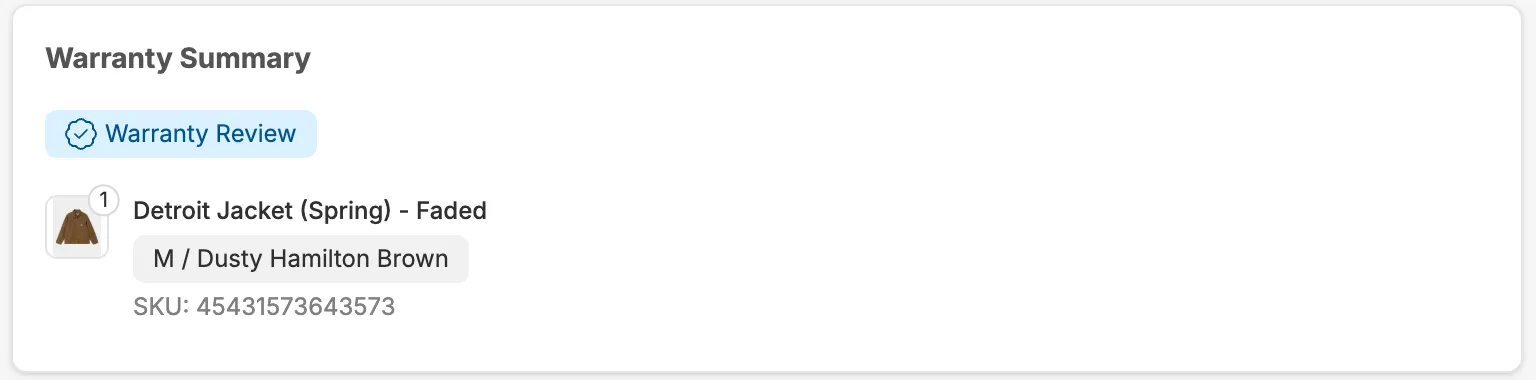
This section is useful when you want to answer basic questions immediately:
- Which item is tied to the warranty claim?
- How many items are still open?
- Has anything already been resolved?
Work each request in Warranty Review
Section titled “Work each request in Warranty Review”The Warranty Review section is where most of the real work happens. Each request can be reviewed and resolved individually, which makes it easier to keep complex claims organized.
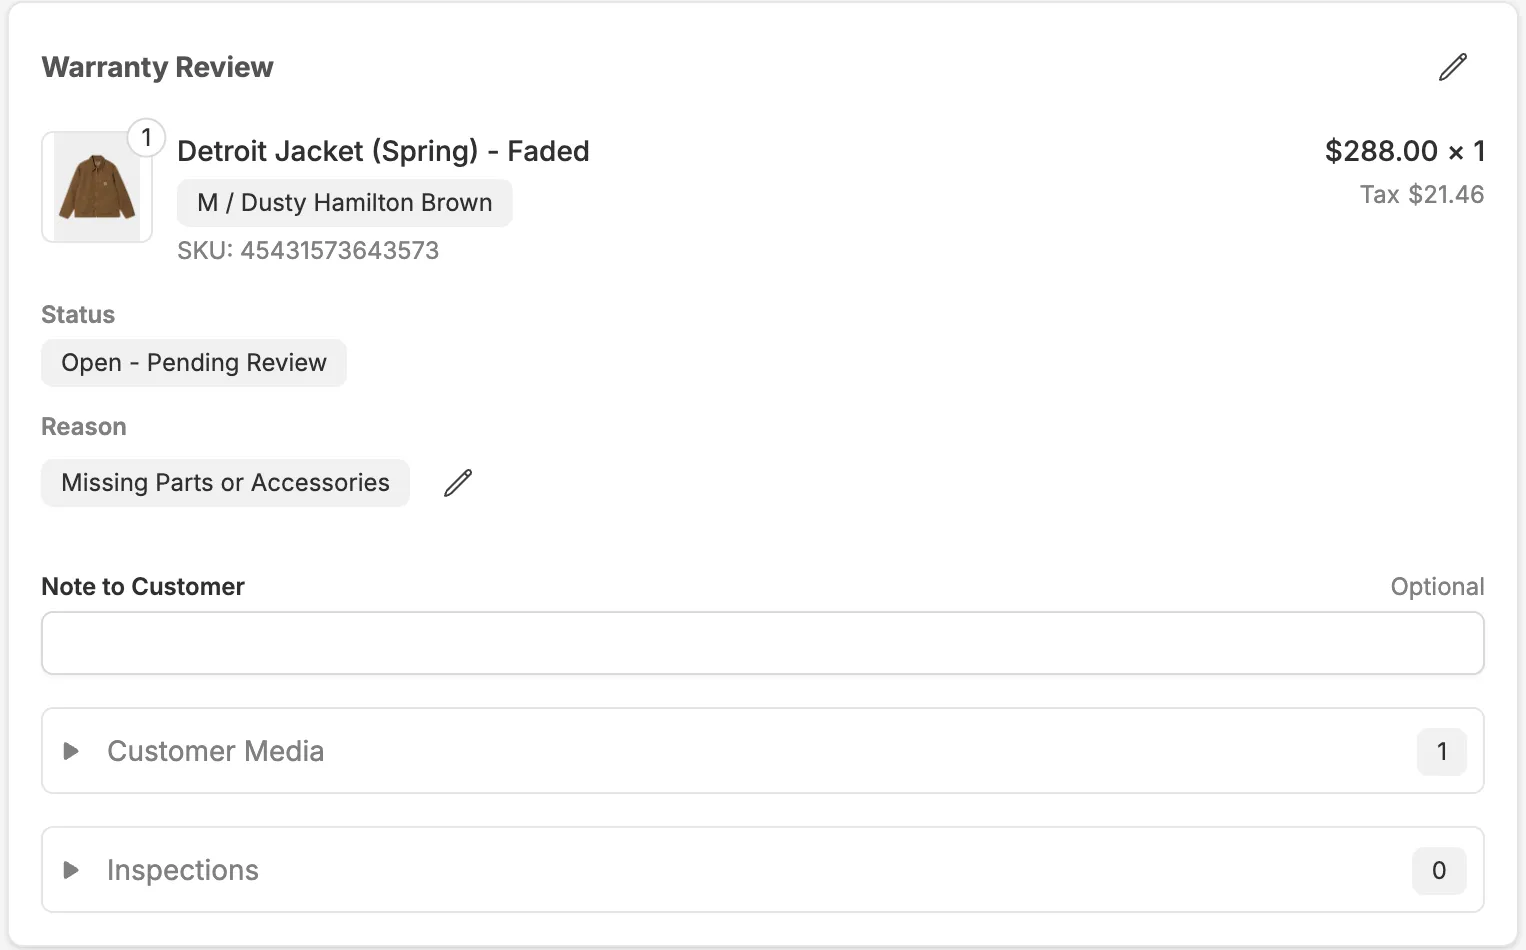
From this view, your team can:
- Review the product, price, quantity, status, and customer-facing note for the request.
- Edit the claim reason and reason details so your reporting stays accurate when you need to review trends or report back to manufacturers. If you need to revisit how reasons, reason details, and product groups should be structured, see Warranty Program Setup Cookbook.
- Add or remove media in Customer Media. You can upload new files directly from the admin and remove files that are no longer needed. The section expands automatically when media is already attached to the claim.
- Complete Inspections for internal review, grading, notes, and supporting images when your warranty workflow requires them. Inspections are optional, must be enabled in warranty settings, and are configured through automations. For setup details, see Setting Up Claim Inspections.
- Edit all fees tied to the request before finalizing the outcome.
- Use the side panel to reference supporting context such as Order Details, Customer Details, Shipping Details, Claim Risk, and Tags.
Edit the resolution without leaving the claim
Section titled “Edit the resolution without leaving the claim”When you are ready to make a decision, open the resolution editor for that request.
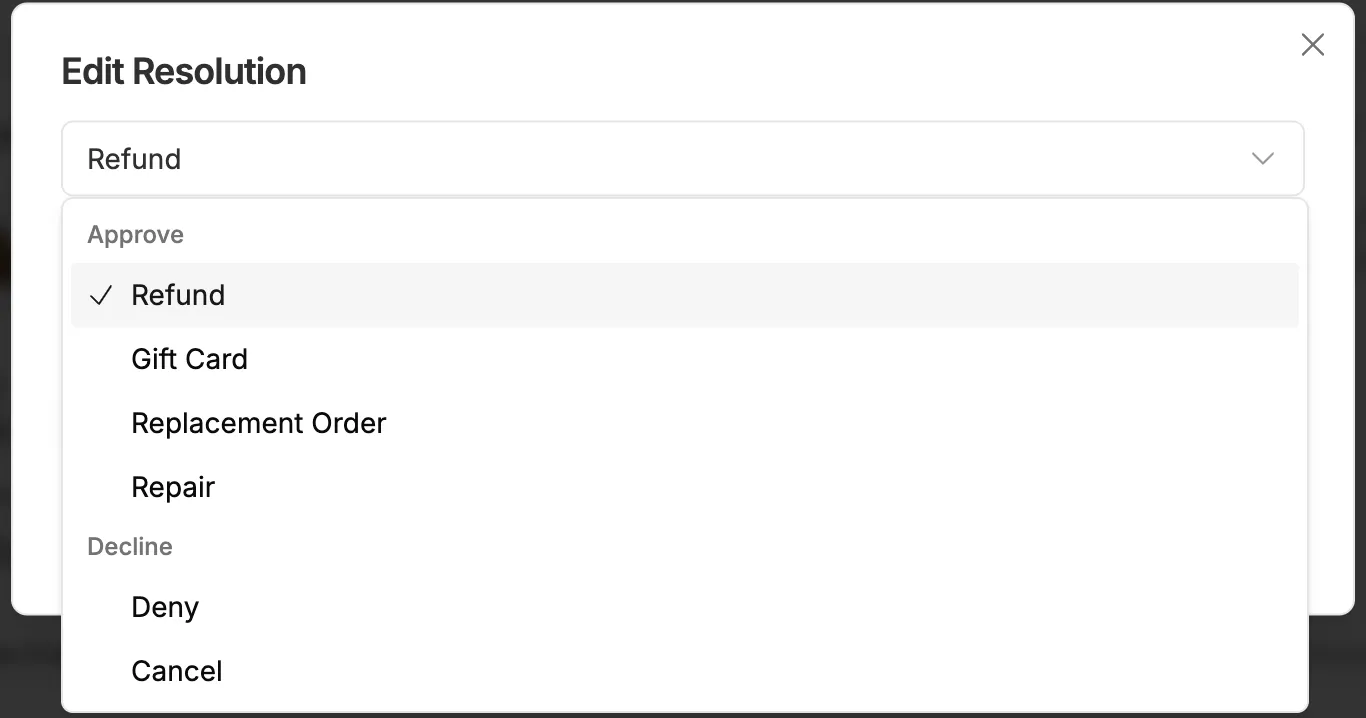
You can change between resolution types directly in the claim, including:
- Refund
- Gift Card
- Replacement Order
- Repair
- Deny
That flexibility is especially useful for warranty workflows because the right outcome is not always obvious at first review.
Resolution options at a glance
Section titled “Resolution options at a glance”- Replacement Order: Replace the original item and search by product ID or product name if you need to swap in a different product.
- Gift Card: Issue store credit, using the original item value or a custom amount when needed.
- Repair: Use Repair when the item should be fixed instead of replaced or refunded. You can also generate the shipment directly in the UI for warranty claims, which helps your team move the item to the correct repair destination without jumping between tools. For the full repair workflow, see Warranty Repair Functionality.
- Deny: Decline the request and optionally leave a note so the customer understands the outcome.
Finalize the claim
Section titled “Finalize the claim”Once each warranty request has been reviewed, updated, and assigned the correct resolution, click Finalize to close the claim. If a shipment is required before finalization, create it directly from the claim first. At that point, you can notify the customer by email and share any final note through the Claim Status Page in the Customer Portal.
If your team uses warranty reporting to monitor claim trends, product issues, or manufacturer feedback loops, see Warranty Dashboards in Corso.