

Allowing Customers to Select Between Returns and Warranties
Overview
Section titled “Overview”Some brands want to give customers the ability to decide whether to file a return or a warranty claim during the overlap period where both policies are valid. This is especially useful when a product is defective but still within the return window, so customers can choose to resolve it through warranty instead of return.
This article explains how this automation works, when it applies, and how to configure it.
What You Can Expect
Section titled “What You Can Expect”With this feature, you can:
- Give customers a choice between starting a return or a warranty claim in your portal.
- Clarify policy differences with customizable explanatory text.
- Customize the label on the return option button to match your brand language.
- Ensure customers take the right claim path based on product issues like defects.
- Use conditions (such as order details, product tags, or customer type) to control when the option appears.
- Improve reporting accuracy by separating warranty claims from returns when appropriate.
This automation adds flexibility to your claims process, improves customer experience, and reduces support overhead from misfiled claims.
Features and Functionality
Section titled “Features and Functionality”When It Applies
Section titled “When It Applies”- The rule only works if both returns and warranties are turned on in your settings. If either is off, customers skip the choice.
- When the rule matches, customers see the choice every time they start a request on that order, including after the return window has closed. The rule doesn’t check windows.
- Without this rule: Customers go straight to a warranty claim only when warranties are on and no item on the order can be returned (for example, every item is past its return window or is final sale). Otherwise they go straight to a return.
- Example: Return policy = 30 days; Warranty policy = 365 days. Without the rule, a customer within the first 30 days is sent to a return, and after 30 days to a warranty claim. With the rule, the customer chooses in both cases.
Customer Experience
Section titled “Customer Experience”When starting a claim in the portal:
- The customer looks up their order and starts a request.
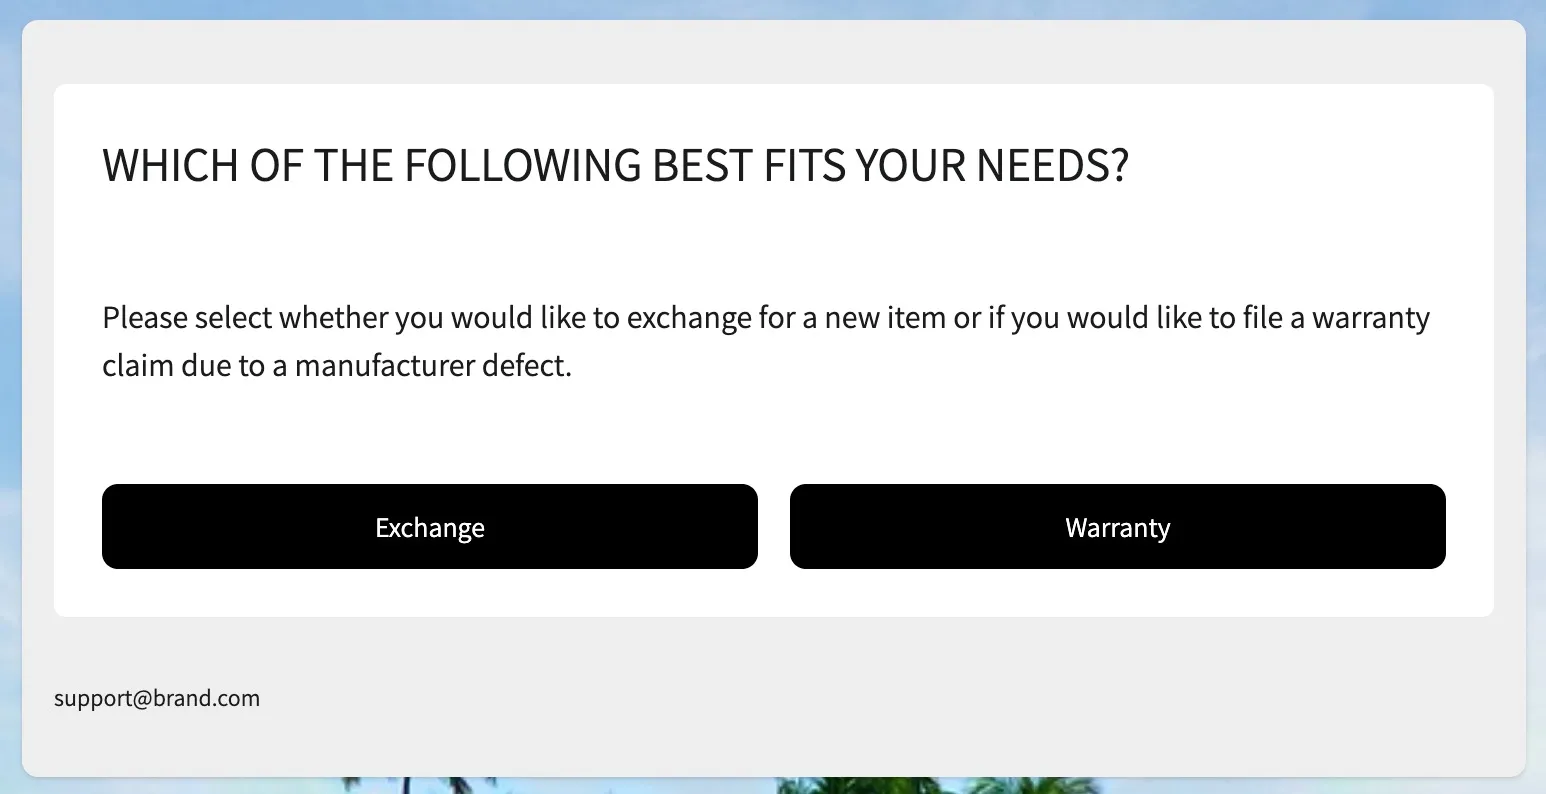
- They see the page Which of the following best fits your needs?, with one button for the return and one for the warranty claim.
- Your Detail Text appears above the buttons to explain the difference.
- The customer clicks a button and continues down that path.
The warranty button uses your warranty program name from your theme settings. The return button uses your Return Selection Button Title, or your return program name if you leave it blank.
Creating the Rule
Section titled “Creating the Rule”In the Automations engine, create the rule called Elect Return or Warranty.
-
Name the rule clearly (e.g., Return or Warranty Choice).
-
(Optional) Add conditions:
- Order details (order date, order country, order tags, days since order)
- Product details (type, collection, product group, SKU, tags)
- Customer details (customer tags, email)
- Registration details
- If no conditions are set, the rule applies to every order.
This rule runs at Order Lookup, before the customer picks a reason, so claim reasons can’t be used as conditions. Corso checks the rule once for the whole order, using the products from all of its items. If any item matches a product condition, the choice is offered.
-
Customize the Detail Text to explain return vs. warranty to your customers. This field is required.
-
(Optional) Set the Return Selection Button Title to customize the label on the return option button. The default label is Return. Use this field if your brand uses different terminology, such as Refund or Start a Return.
-
Save and enable the rule.
Example: Defective Products
Section titled “Example: Defective Products”- Scenario: A product is defective within 30 days.
- Customer Choice: Instead of processing a return, the customer can file a warranty claim.
- Benefit: Cleaner reporting and better tracking of defects versus returns.
Implementation Steps
Section titled “Implementation Steps”- Go to Settings > Automations in your Corso Admin.
- Click Create and choose Select Return or Warranty under What would you like to do?
- Add optional conditions if needed.
- Enter your explanatory Detail Text.
- (Optional) Enter a custom Return Selection Button Title if you want the return button to use different wording than the default.
- Save and enable the rule.
Q: What if I only use returns or only warranties?
This feature only applies if both are turned on. Customers go straight to the one that’s on.
Q: What if I have more than one of these rules?
Only the highest-priority matching rule applies, so its Detail Text and button title are the ones customers see.
Q: Can I restrict the choice to certain products?
Yes. Add product-based conditions to the rule (e.g., only defective-prone categories).
Q: What happens after the return window expires?
Customers still see the choice if the rule matches. If you want past-window customers to go straight to a warranty claim, add a condition that matches only newer orders, such as Order Days Since Created Less Than your return window. Order Days Since Created counts from the order date. If your return windows start at fulfillment or delivery, add a few days of buffer.
Q: Can I customize the text customers see?
Yes. The Detail Text field is fully customizable to explain why a customer might choose return vs. warranty.
Q: Can I change the label on the return button?
Yes. Use the Return Selection Button Title field to replace the default Return label with any text that fits your brand. If you leave the field empty, Corso uses your configured return program name from your theme settings.