

How to Add the Corso Snippet to Shopify Order Confirmation Emails
Getting Started
Section titled “Getting Started”You can add a Corso snippet to your Shopify order confirmation email that displays only when a customer purchases Package Protection—whether it’s through the product or shipping rate method.
This snippet gives customers clear instructions on how to file a claim or contact Corso, helping reduce your support load and improving the post-purchase experience.
Why Add This Snippet?
Section titled “Why Add This Snippet?”✅ Automatically routes shipping claims to Corso
✅ Gives protected customers clear next steps
✅ Reduces customer support tickets for your team
How to Add the Snippet in Shopify
Section titled “How to Add the Snippet in Shopify”1. Go to Notification Settings
Section titled “1. Go to Notification Settings”In your Shopify admin, navigate to:
Settings > Notifications > Order Confirmation
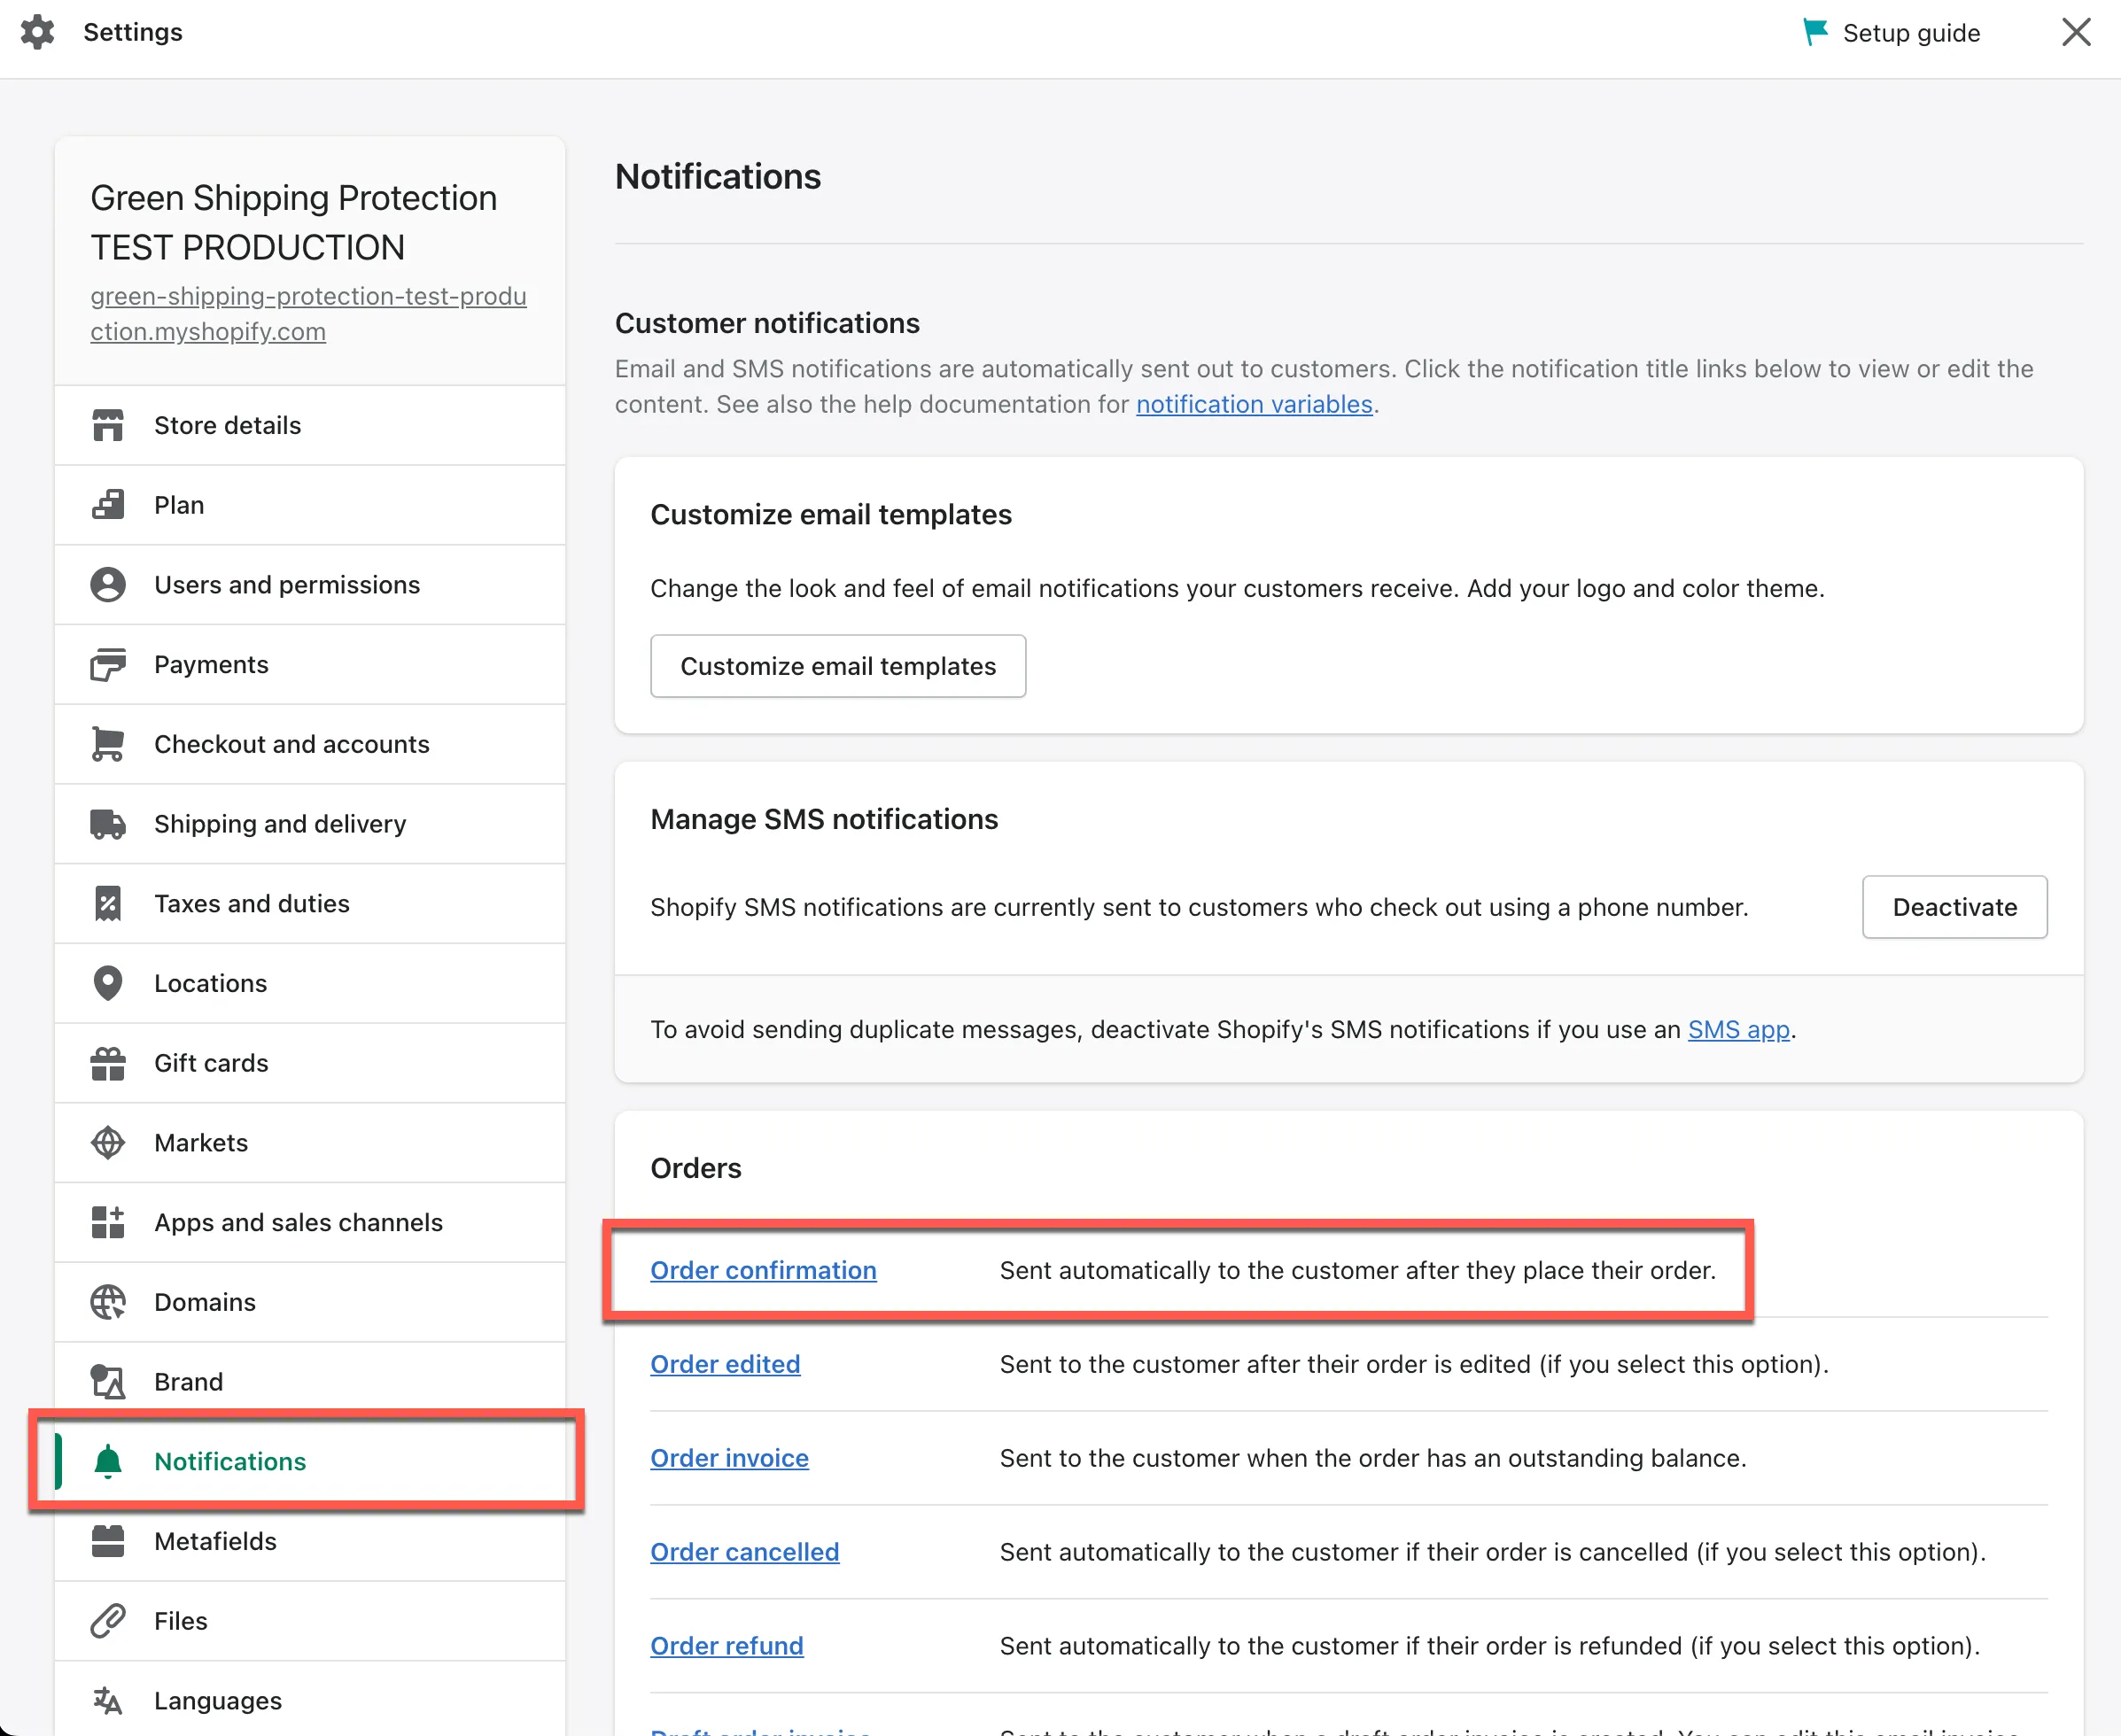
2. Choose Where to Place the Snippet
Section titled “2. Choose Where to Place the Snippet”Scroll through the HTML email template and find where you’d like to place the Corso message.
We recommend placing it just below the “Visit our store” button in the default template.
3. Paste in the Snippet
Section titled “3. Paste in the Snippet”Use the version provided in the knowledge base or provided by your Corso onboarding team. It should look something like this:
<!--Corso Code Start--> {% for line in subtotal_line_items %} {% for vendor in line.product.vendor %} {% if vendor contains 'Corso' or order.attributes._corsoSpGuarantee == 'true' %} {% assign hasCorso = true %} {% break %} {% endif %} {% endfor %} {% endfor %} {% if hasCorso %} <tr> <td><div style="padding: 20px; margin: 0 auto; border-top: 1px solid #DDD; border-bottom: 1px solid #DDD; max-width: 560px; width: 100%; box-sizing: border-box; text-align: center;"> <div style="padding-bottom: 10px;"> <img style="width: 80px; max-width: 100%;" src="https://cdn.corso.com/img/corso-logo.png" alt="corso logo" title="corso logo"> </div> <p style="color: #777; line-height: 150%; font-size: 16px; margin: 0; padding: 0 10px;"> Thanks for choosing a Corso shipping option. Should you have any shipping issues with lost, damaged, missing, or stolen items, simply go <a href="https://app.corso.com/[brand-path-name]/reorder/{{order.id}}" style="color: #007bff;">here</a>. If you don't want streamlined resolutions for shipping issues or if this was added by mistake, <a href="https://app.corso.com/[brand-path-name]/order/{{order.id}}/edit" style="color: #007bff;">please contact us</a>. </p> </div> </td> </tr> {% endif %}<!--Corso Code End-->4. Customize the URLs
Section titled “4. Customize the URLs”The snippet contains two links — the claim link and the opt-out link — and both use the same placeholder:
[brand-path-name]
Replace it with your brand path name assigned by Corso
(Found in Corso Admin under Settings > Theme)
The claim link is a deep link that includes the orderId, allowing customers to go directly to their order within the Corso portal rather than having to manually look up their order using their Order Number and Email.
The opt-out link points to Order Editing, where the customer can remove protection from their order themselves.
To send customers to a different part of the portal — the Hub or Order Editing — swap the claim link for one of the URLs in Customer Portal Deep Links below.
5. Save and Preview
Section titled “5. Save and Preview”Once you’ve added the snippet:
- Click Save in Shopify
- Use the “Preview email” button
- Or inspect the email using your browser’s developer tools to confirm the snippet appears correctly
Note: The snippet will only display when the order includes a Corso-protected shipping line or the Corso product (vendor = Corso). It will not show for unprotected orders.
Customer Portal Deep Links
Section titled “Customer Portal Deep Links”You can point the snippet at any part of the customer portal. Which URL structure you use depends on how your portal is set up.
Corso Domain (Non-embedded)
Section titled “Corso Domain (Non-embedded)”Use these if your portal is hosted by Corso at app.corso.com. Deep links use a path structure.
| Destination | URL |
|---|---|
| Shipping Protection claim | https://app.corso.com/[brand-path-name]/reorder/{{order.id}} |
| Hub | https://app.corso.com/[brand-path-name]/order/{{order.id}} |
| Order Editing | https://app.corso.com/[brand-path-name]/order/{{order.id}}/edit |
Brand Domain (Embedded)
Section titled “Brand Domain (Embedded)”Use these if your portal is embedded on your own site. Deep links use URL parameters, which the embedded portal reads from the host page.
| Destination | URL |
|---|---|
| Hub | https://[brand-site-domain]/pages/[shopify-page]?orderId={{order.id}} |
| Order Editing | https://[brand-site-domain]/pages/[shopify-page]?orderId={{order.id}}&isOrderEdit=true |
Placeholders
Section titled “Placeholders”| Placeholder | What to replace it with |
|---|---|
[brand-path-name] | Your Corso brand path name, found in Corso Admin under Settings > Theme |
[brand-site-domain] | Your store’s domain, for example www.yourstore.com |
[shopify-page] | The handle of the Shopify page your portal is embedded on, for example manage-your-order |
{{order.id}} | Leave as-is. Shopify’s Liquid fills in the order ID when the email sends |
Listing Shipping Protection Last
Section titled “Listing Shipping Protection Last”Shopify lists checkout and order line items in the order they were added to the cart, and shipping protection is usually added last, so it can show up first. Neither Shopify nor Corso can change the order in checkout. In your order confirmation email, though, you can show protection last by looping over the line items twice: products first, then protection.
In the order confirmation template, find the loop that renders each line item. It starts with {% for line in subtotal_line_items %} and ends with {% endfor %}. Wrap it like this, keeping your existing row markup unchanged:
{%- for corso_pass in (1..2) -%} {%- for line in subtotal_line_items -%} {%- assign corso_line_vendor = line.vendor | default: line.product.vendor | append: '' | downcase -%} {%- assign is_corso_line = false -%} {%- if corso_line_vendor contains 'corso' -%}{%- assign is_corso_line = true -%}{%- endif -%} {%- if corso_pass == 1 and is_corso_line -%}{%- continue -%}{%- endif -%} {%- if corso_pass == 2 and is_corso_line == false -%}{%- continue -%}{%- endif -%} <!-- your existing line item row markup --> {%- endfor -%}{%- endfor -%}The first pass shows everything except protection, and the second shows only protection. Order totals don’t change. Back up your template before editing, then send a test order with protection added first to confirm the result.
Need Help?
Section titled “Need Help?”We’re happy to help you customize and place this snippet. If you’d prefer our team to handle this setup or need assistance finding your Corso URLs, just reach out.