Checkout Plus Setup
Corso Checkout Plus makes it easy to display buyer consent for premium services like delivery protection. This guide walks through setting it up in just a few steps.
If you’re migrating from a legacy script tag, please contact Corso to assist with the transition.
1. Add the Checkout Plus App Embed to Your Shopify Theme
Section titled “1. Add the Checkout Plus App Embed to Your Shopify Theme”Start by navigating to the Checkout Plus tab in your Corso Admin settings.
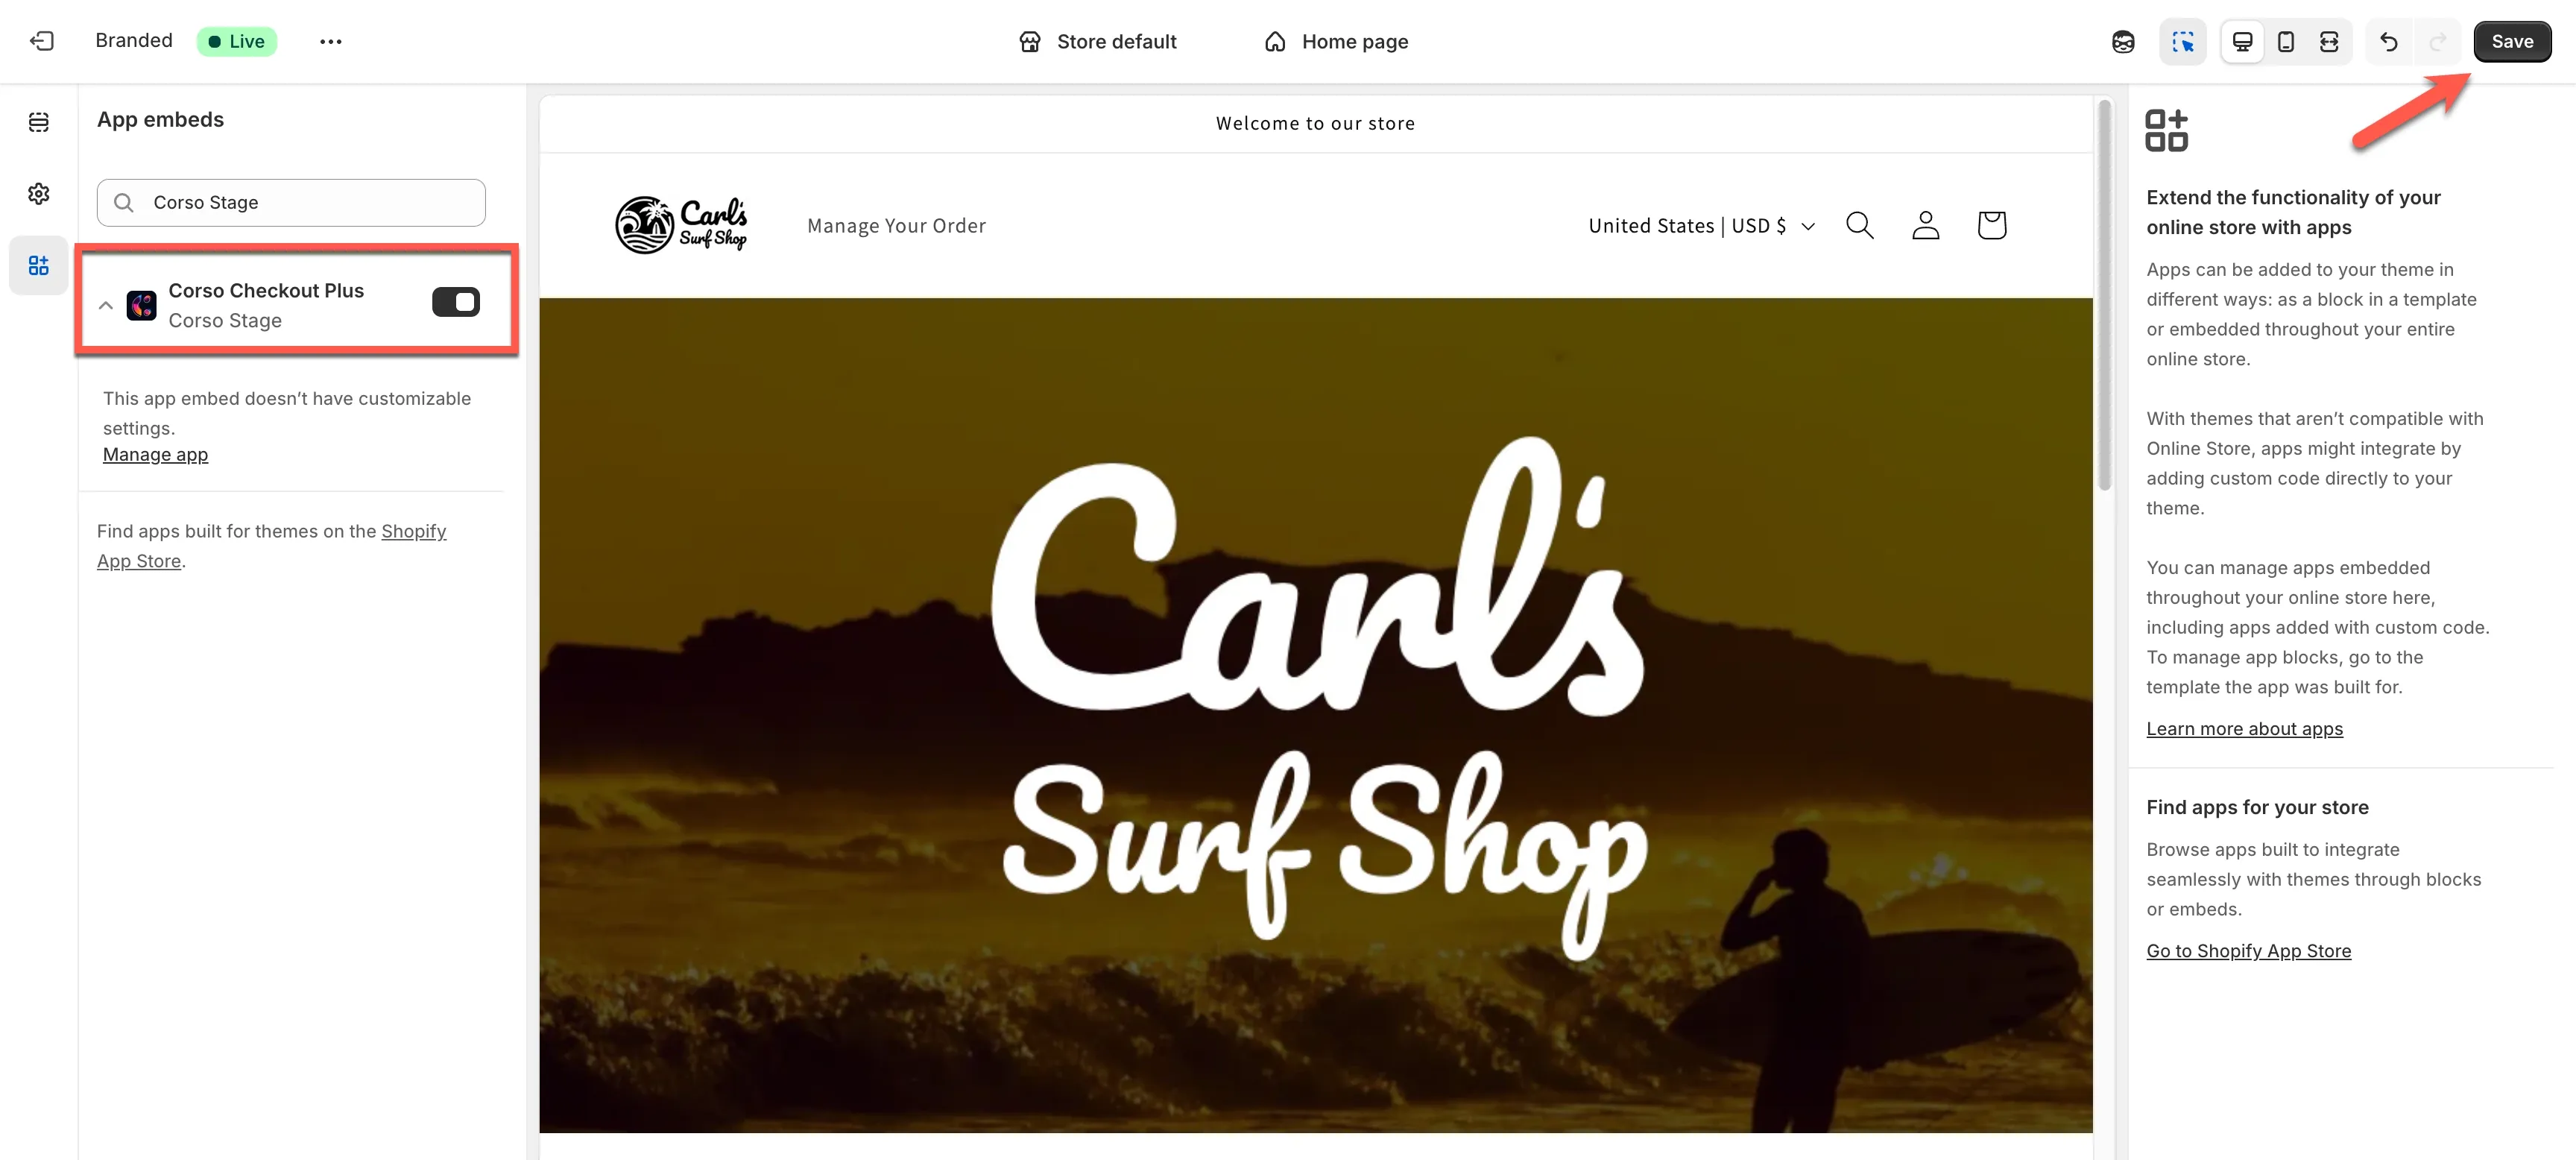
- Click the “Activate” button next to Activate Theme App Embed.

- You’ll be directed to your Shopify theme editor where the Checkout Plus app embed will be enabled. Be sure to click the “Save” button in the top-right corner to apply the changes to your live theme. This step enables the app embed but does not automatically add the Checkout Plus elements to your storefront. You will still need to configure the experience in the Corso Admin dashboard as outlined in the next steps.
2. Configure Products (if needed)
Section titled “2. Configure Products (if needed)”If your store uses Corso variants in inventory, click “Configure” to sync Corso products to your Shopify store..
This ensures Corso’s Checkout Plus elements are linked properly to your store’s product catalog and inventory.
3. Enable Checkout Plus
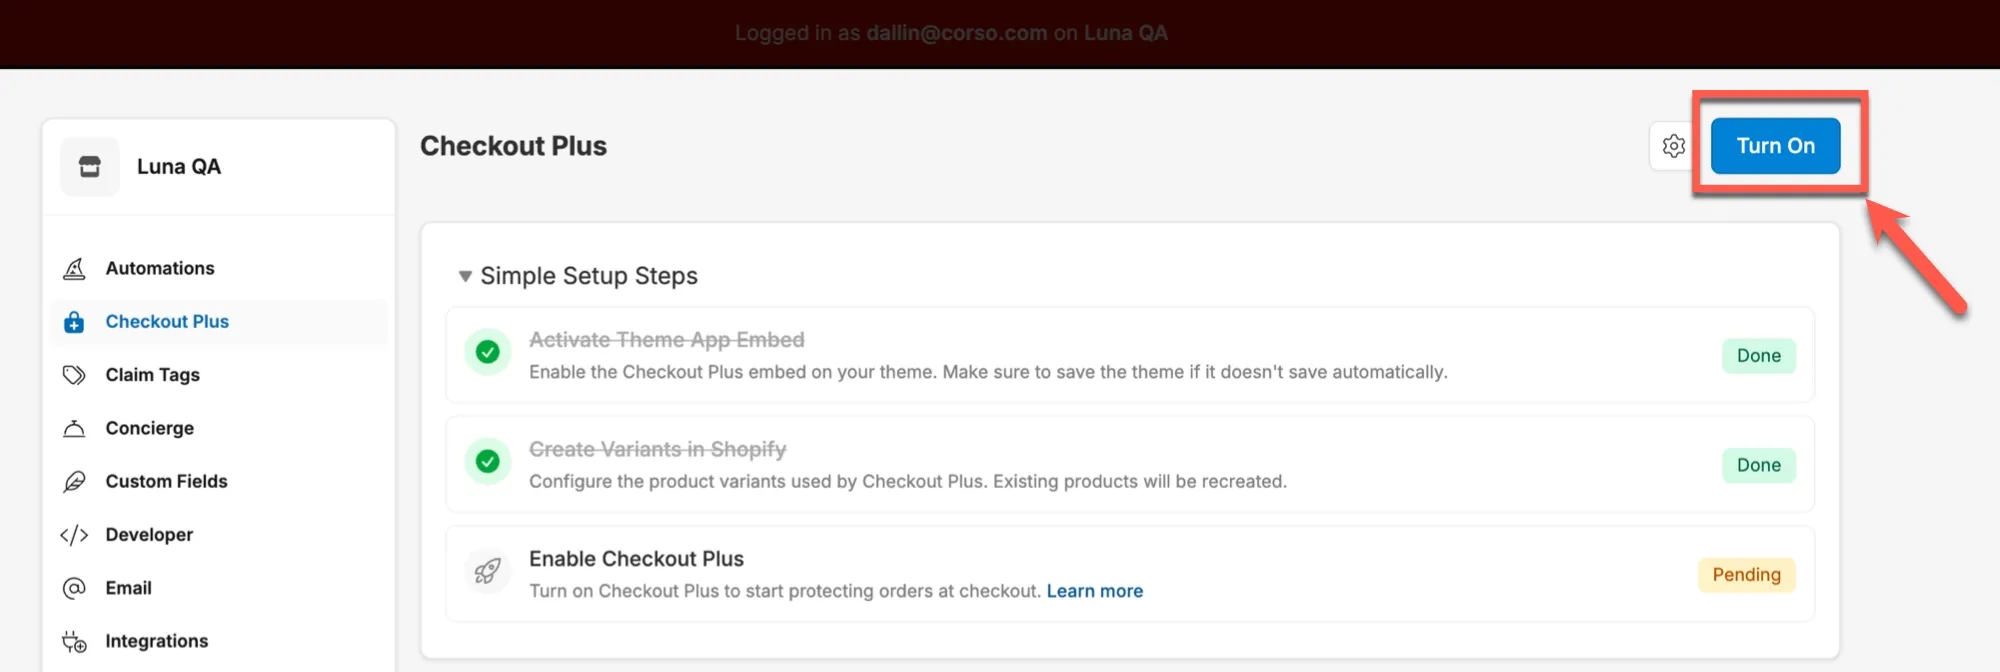
Section titled “3. Enable Checkout Plus”The steps below will walk you through the process of configuring Checkout Plus in the Corso Admin dashboard. This is where you can customize the experience to fit your store’s unique setup and design.
Once you are ready, then “Turn On” the Checkout Plus experience to make it live on your storefront.
Action Type
Section titled “Action Type”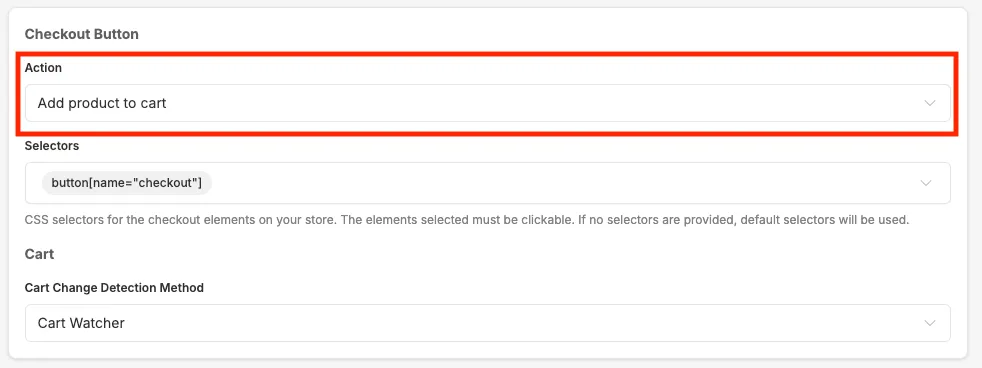
In most cases, this will be set to “Add product to cart”, especially if you’re adding the Corso Delivery Guarantee product during checkout. However, if your store has a different setup, you can adjust the action type here to suit your specific needs.
Adjust Checkout Button Selectors
Section titled “Adjust Checkout Button Selectors”Next, define selectors so Checkout Plus can attach to your theme’s checkout elements.
- Scroll to the Checkout Button section.
- Under Selectors, add the CSS selector that targets your checkout trigger.
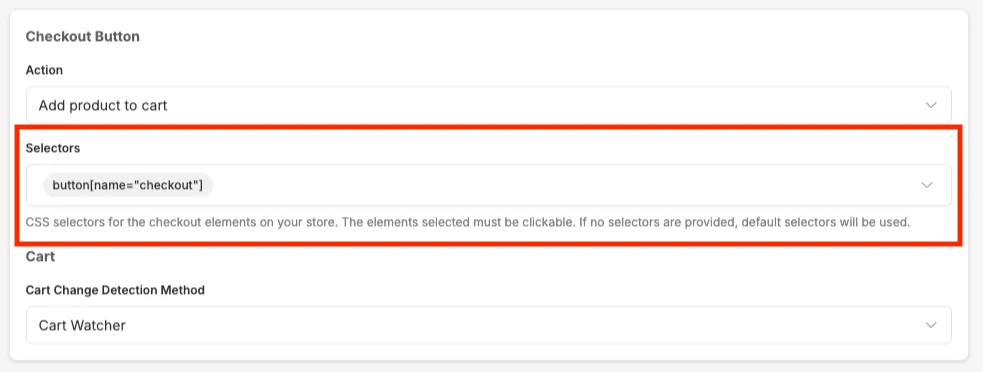
These selectors must be present on your live theme and must reference clickable elements. Corso uses these to track when checkout is initiated.
Configure the Checkout Plus Elements
Section titled “Configure the Checkout Plus Elements”You’ll now configure both elements that power the Checkout Plus experience.
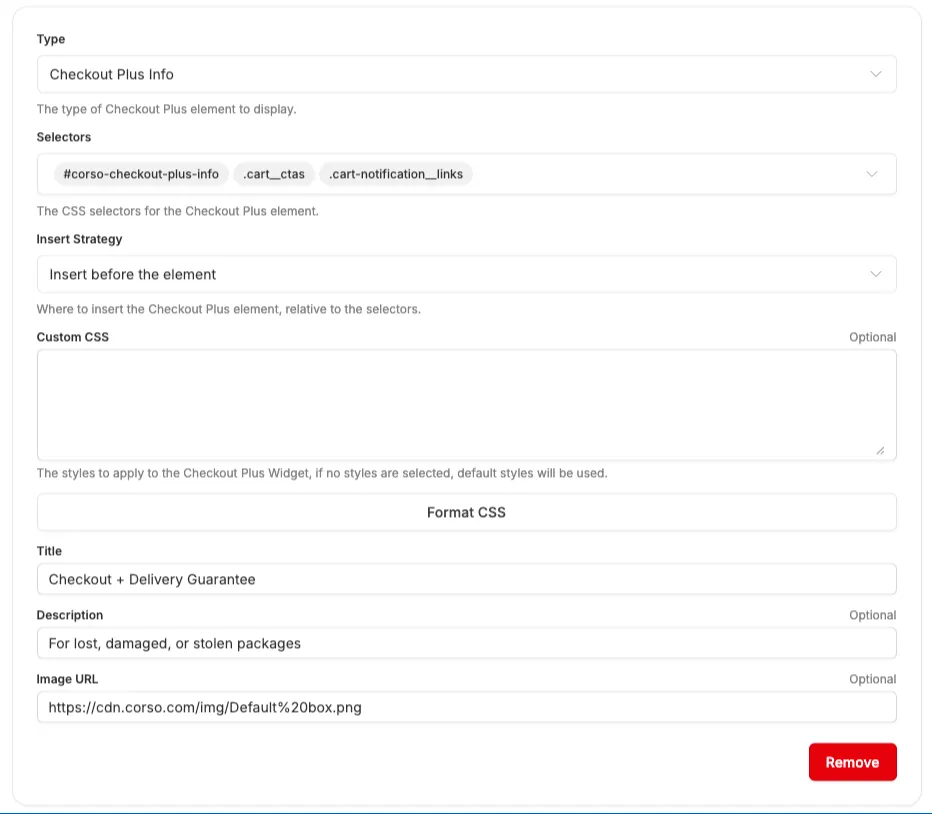
Checkout Plus Info
Section titled “Checkout Plus Info”This element displays the “Checkout + Delivery Guarantee” information, typically above the checkout button.
-
Type:
Checkout Plus Info -
Selectors: Add selectors for placement (e.g.
.cart__ctas,#cart-notification__links) -
Insert Strategy: Controls if the element is inserted before or after the target
-
Optional Fields:
- Title (e.g.
Checkout + Delivery Guarantee) - Description (e.g.
For lost, damaged, or stolen packages) - Image URL (a hosted image)
- Title (e.g.
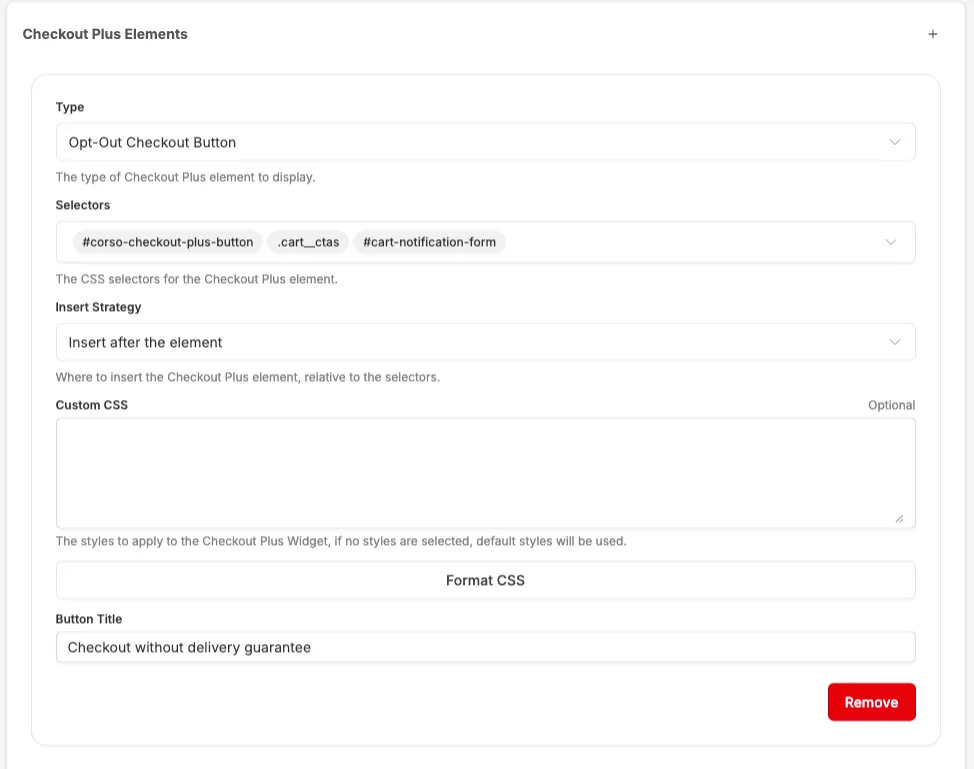
Opt-Out Checkout Button
Section titled “Opt-Out Checkout Button”This lets customers check out without the added service.
- Type:
Opt-Out Checkout Button - Selectors: Add selectors for the button container (e.g.
.cart__ctas,#cart-notification-form) - Insert Strategy: Leave as default unless your layout requires custom placement
- Optional Fields:
- Button Title (e.g.
Checkout without delivery guarantee)
- Button Title (e.g.
Customize with Corso Variables (Optional)
Section titled “Customize with Corso Variables (Optional)”You can apply Custom CSS to both elements using Corso’s available variables.
Turn On Checkout Plus
Section titled “Turn On Checkout Plus”Once everything is configured:
- Click the Turn On button at the top-right of the page
- Verify that the Checkout Plus elements appear in your cart and/or checkout drawer
You’re now fully set up with Checkout Plus!
Add Corso “Checkout Extension” and “Remove Product” to Checkout (Optional)
Section titled “Add Corso “Checkout Extension” and “Remove Product” to Checkout (Optional)”The Corso Checkout Extension adds a simple checkbox at checkout, allowing customers to easily opt in or out of Shipping Protection.
If your store uses Checkout Plus, the checkbox will automatically reflect the customer’s initial selection so their preference carries through to checkout. Customers can still change their choice at any time by checking or unchecking the box.
The extension also works seamlessly with the Corso Remove Product Extension. If a customer removes an item from their cart, the checkbox will automatically update and become unchecked to keep everything in sync.
If you would like to add the checkout extension use the following steps:
- Go to Shopify Settings
- Go to Checkout
- Customize
- Select the Corso Checkout Extension or Remove Product Extension from the list of available extensions
- Add block where you want the extension
- Set up any checkout behavior within the checkout extension settings as needed
Still Not Getting the Results You Want?
Section titled “Still Not Getting the Results You Want?”We are always happy to help! Please don’t hesitate to reach out to our support team!