Setting Up Claim Inspections
Claim inspections allow your team to verify returned or warranty items before finalizing claims. This feature is used when items are physically reviewed in a warehouse or by your team to ensure consistent decision-making and improved claim accuracy.
Note: Inspections are internal-only and never shown to customers.
Prerequisites
Section titled “Prerequisites”Enable Inspections in Settings
Section titled “Enable Inspections in Settings”Before creating inspection rules, you must enable inspections:
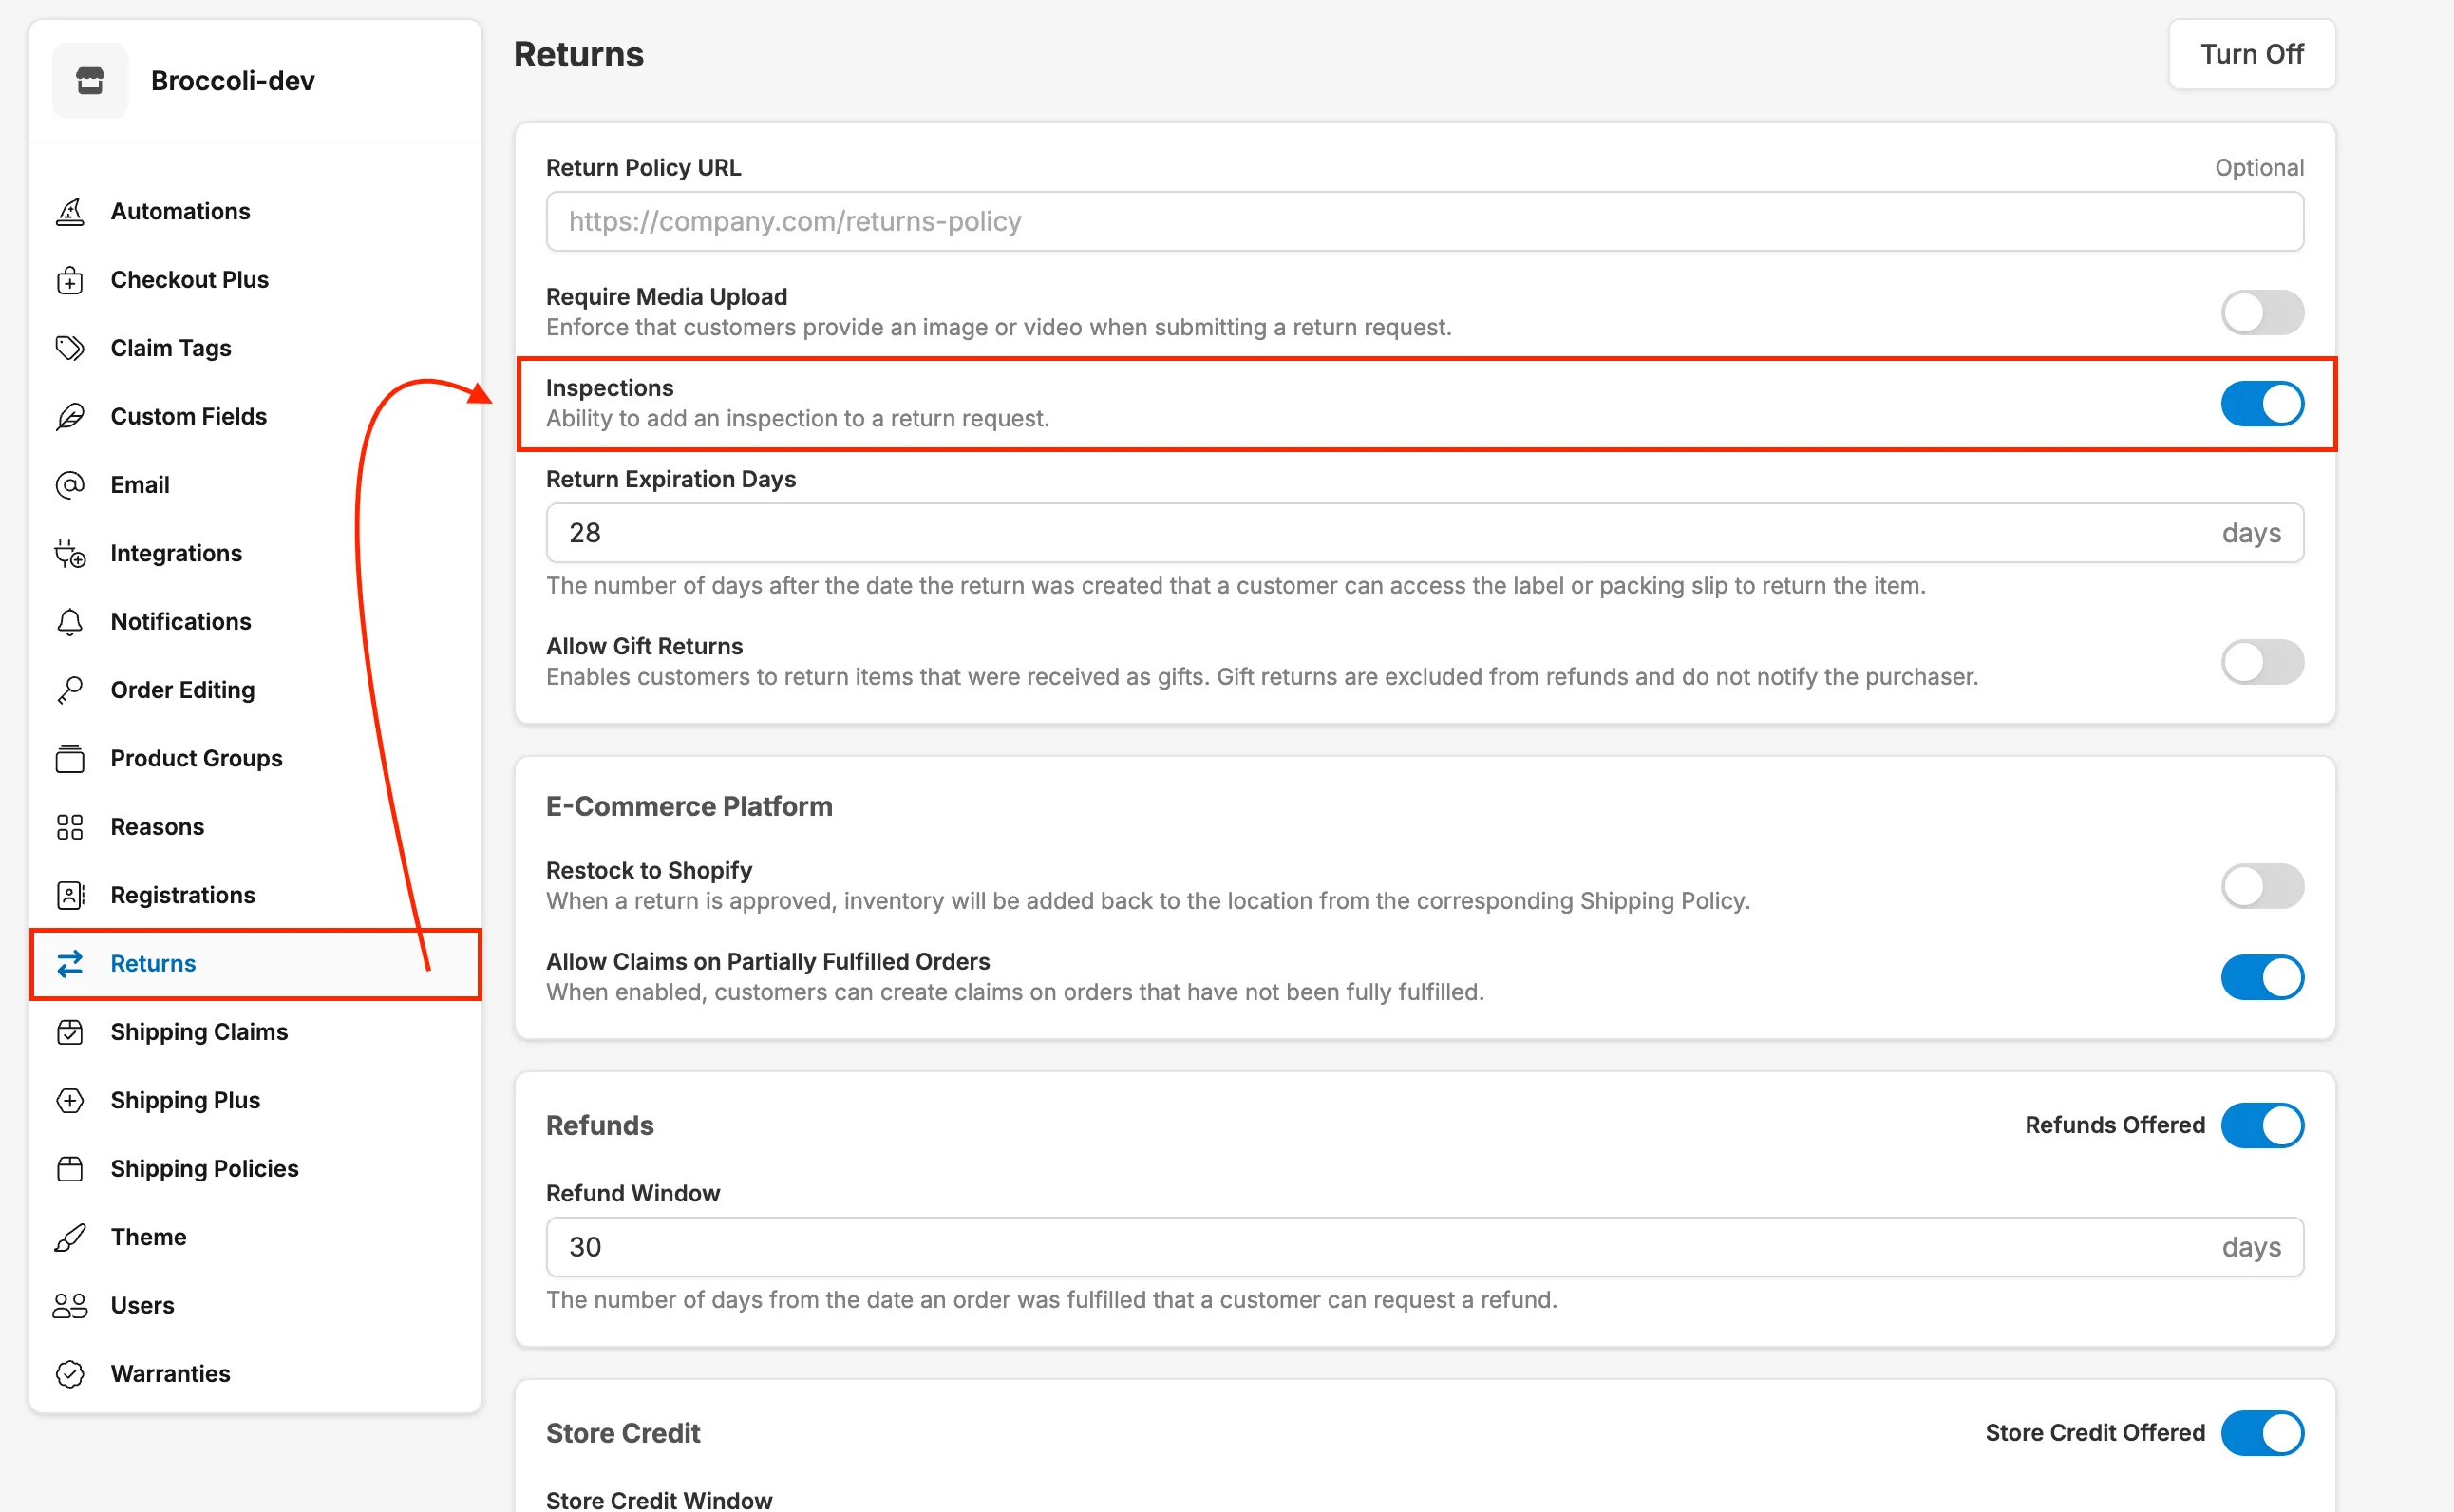
For Returns:
- Go to Settings → Returns
- Toggle Inspections to ON
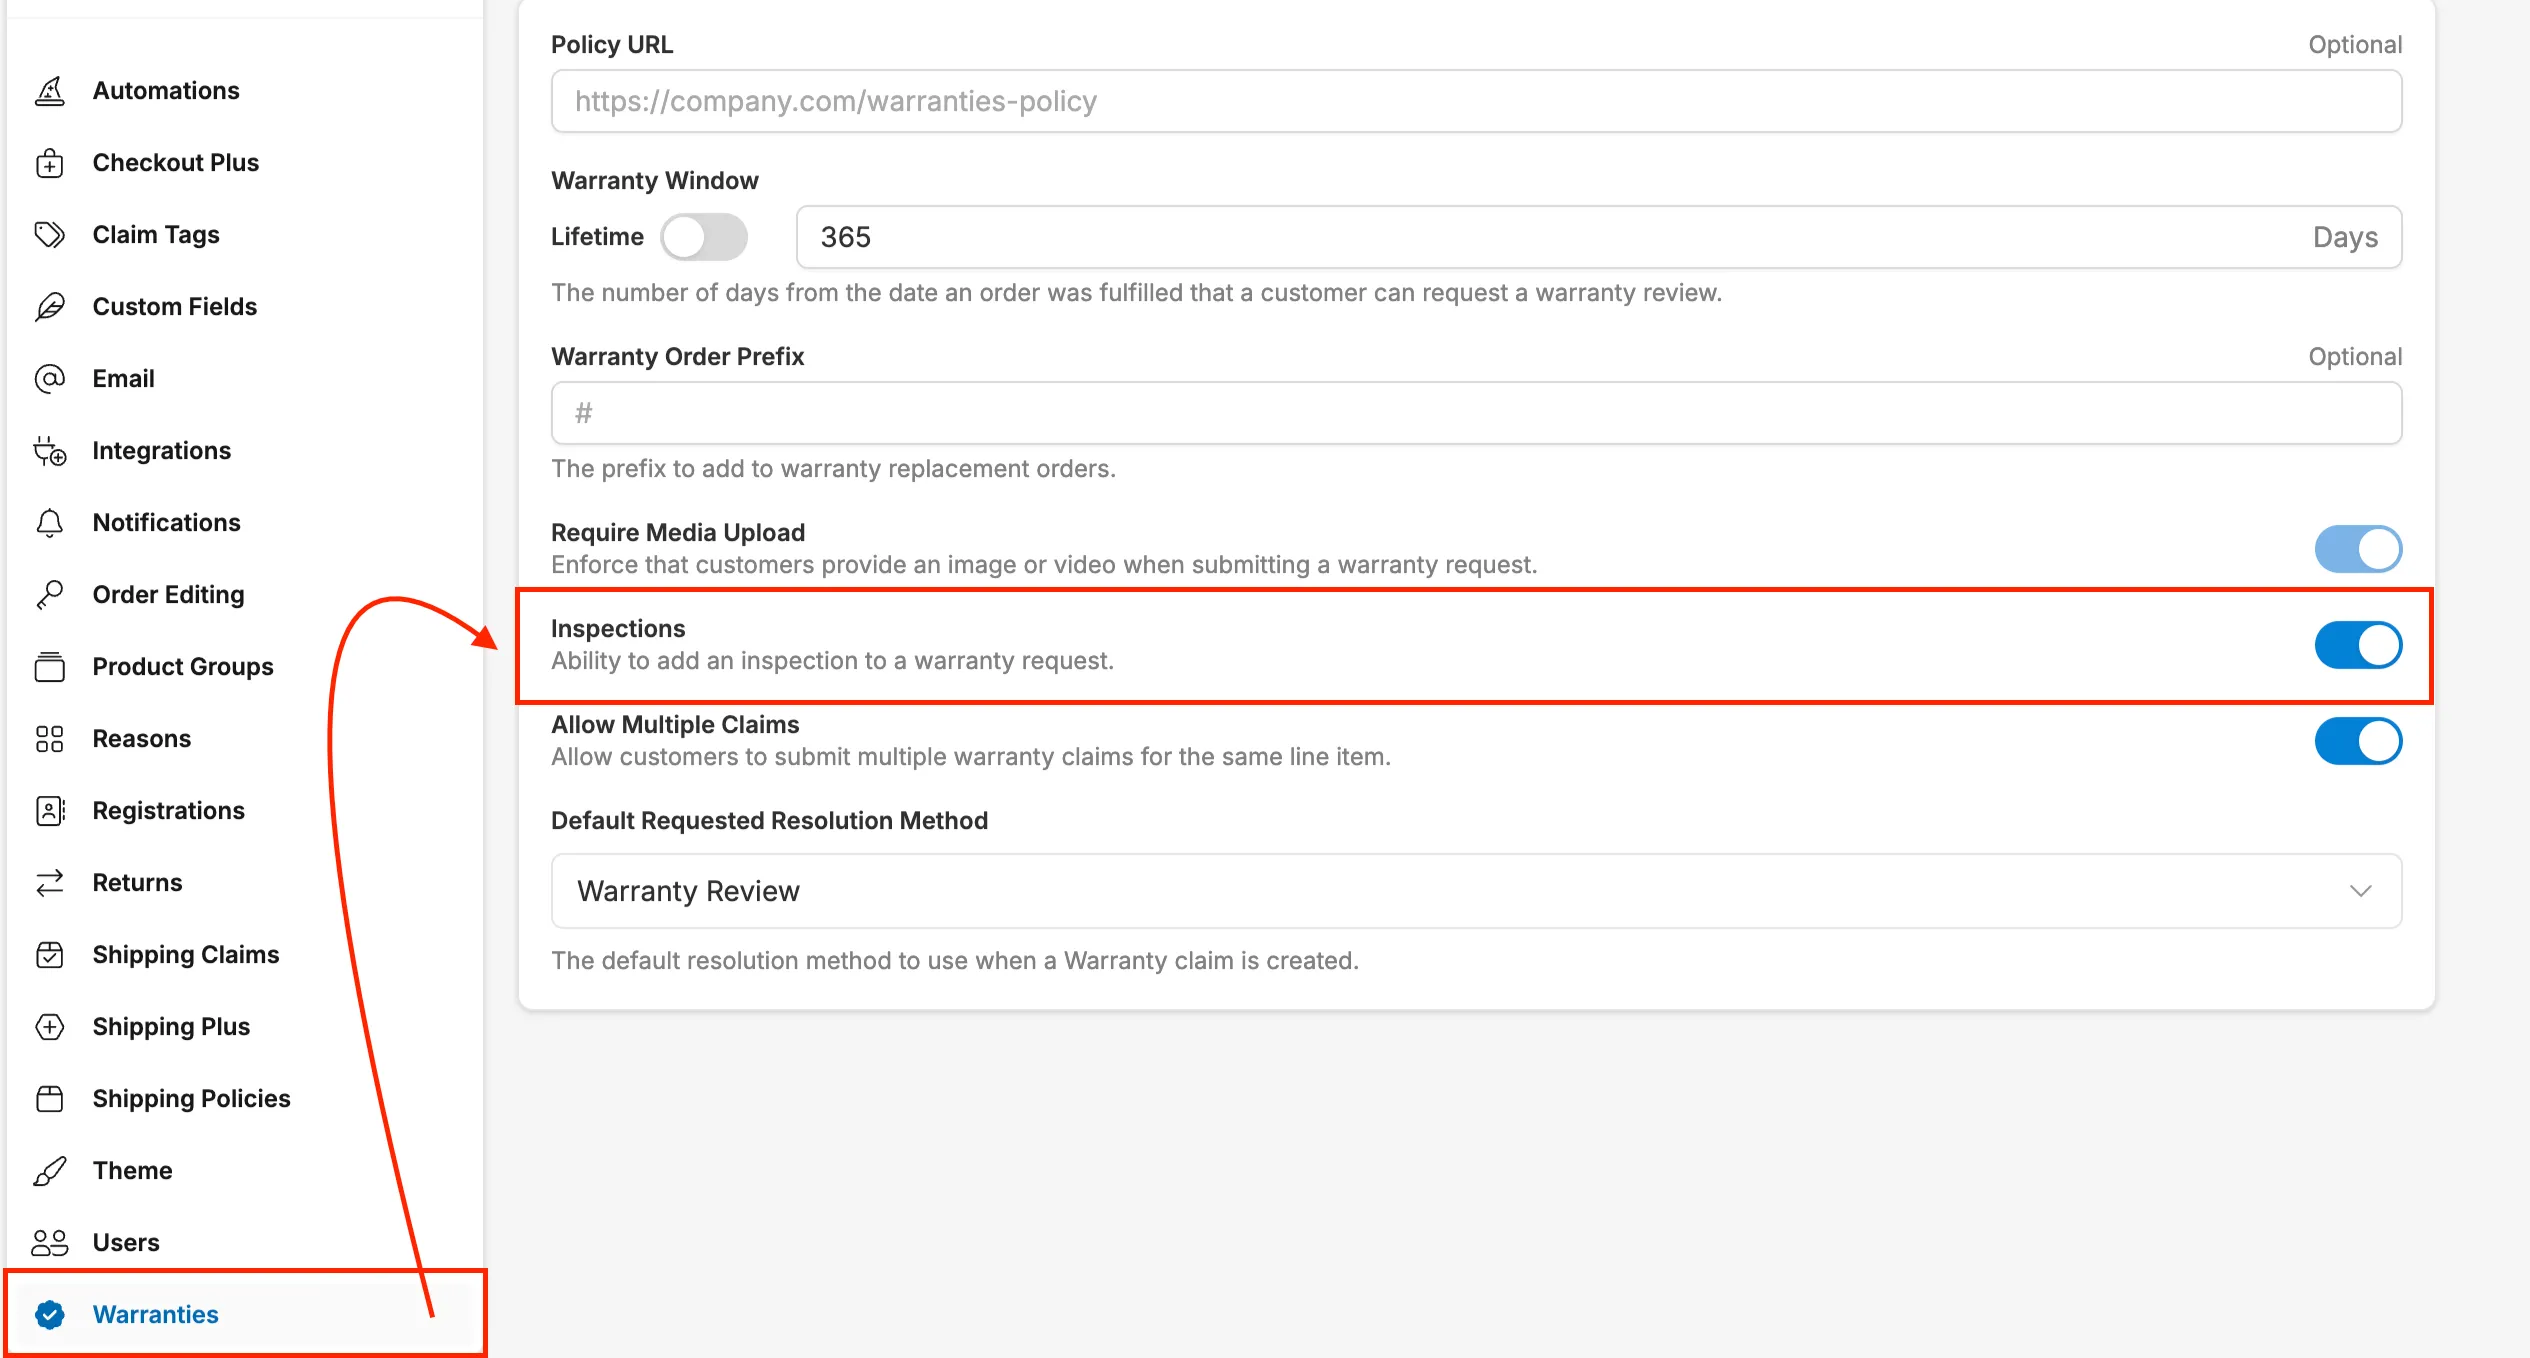
For Warranties:
- Go to Settings → Warranties
- Toggle Inspections to ON
Setup Steps
Section titled “Setup Steps”-
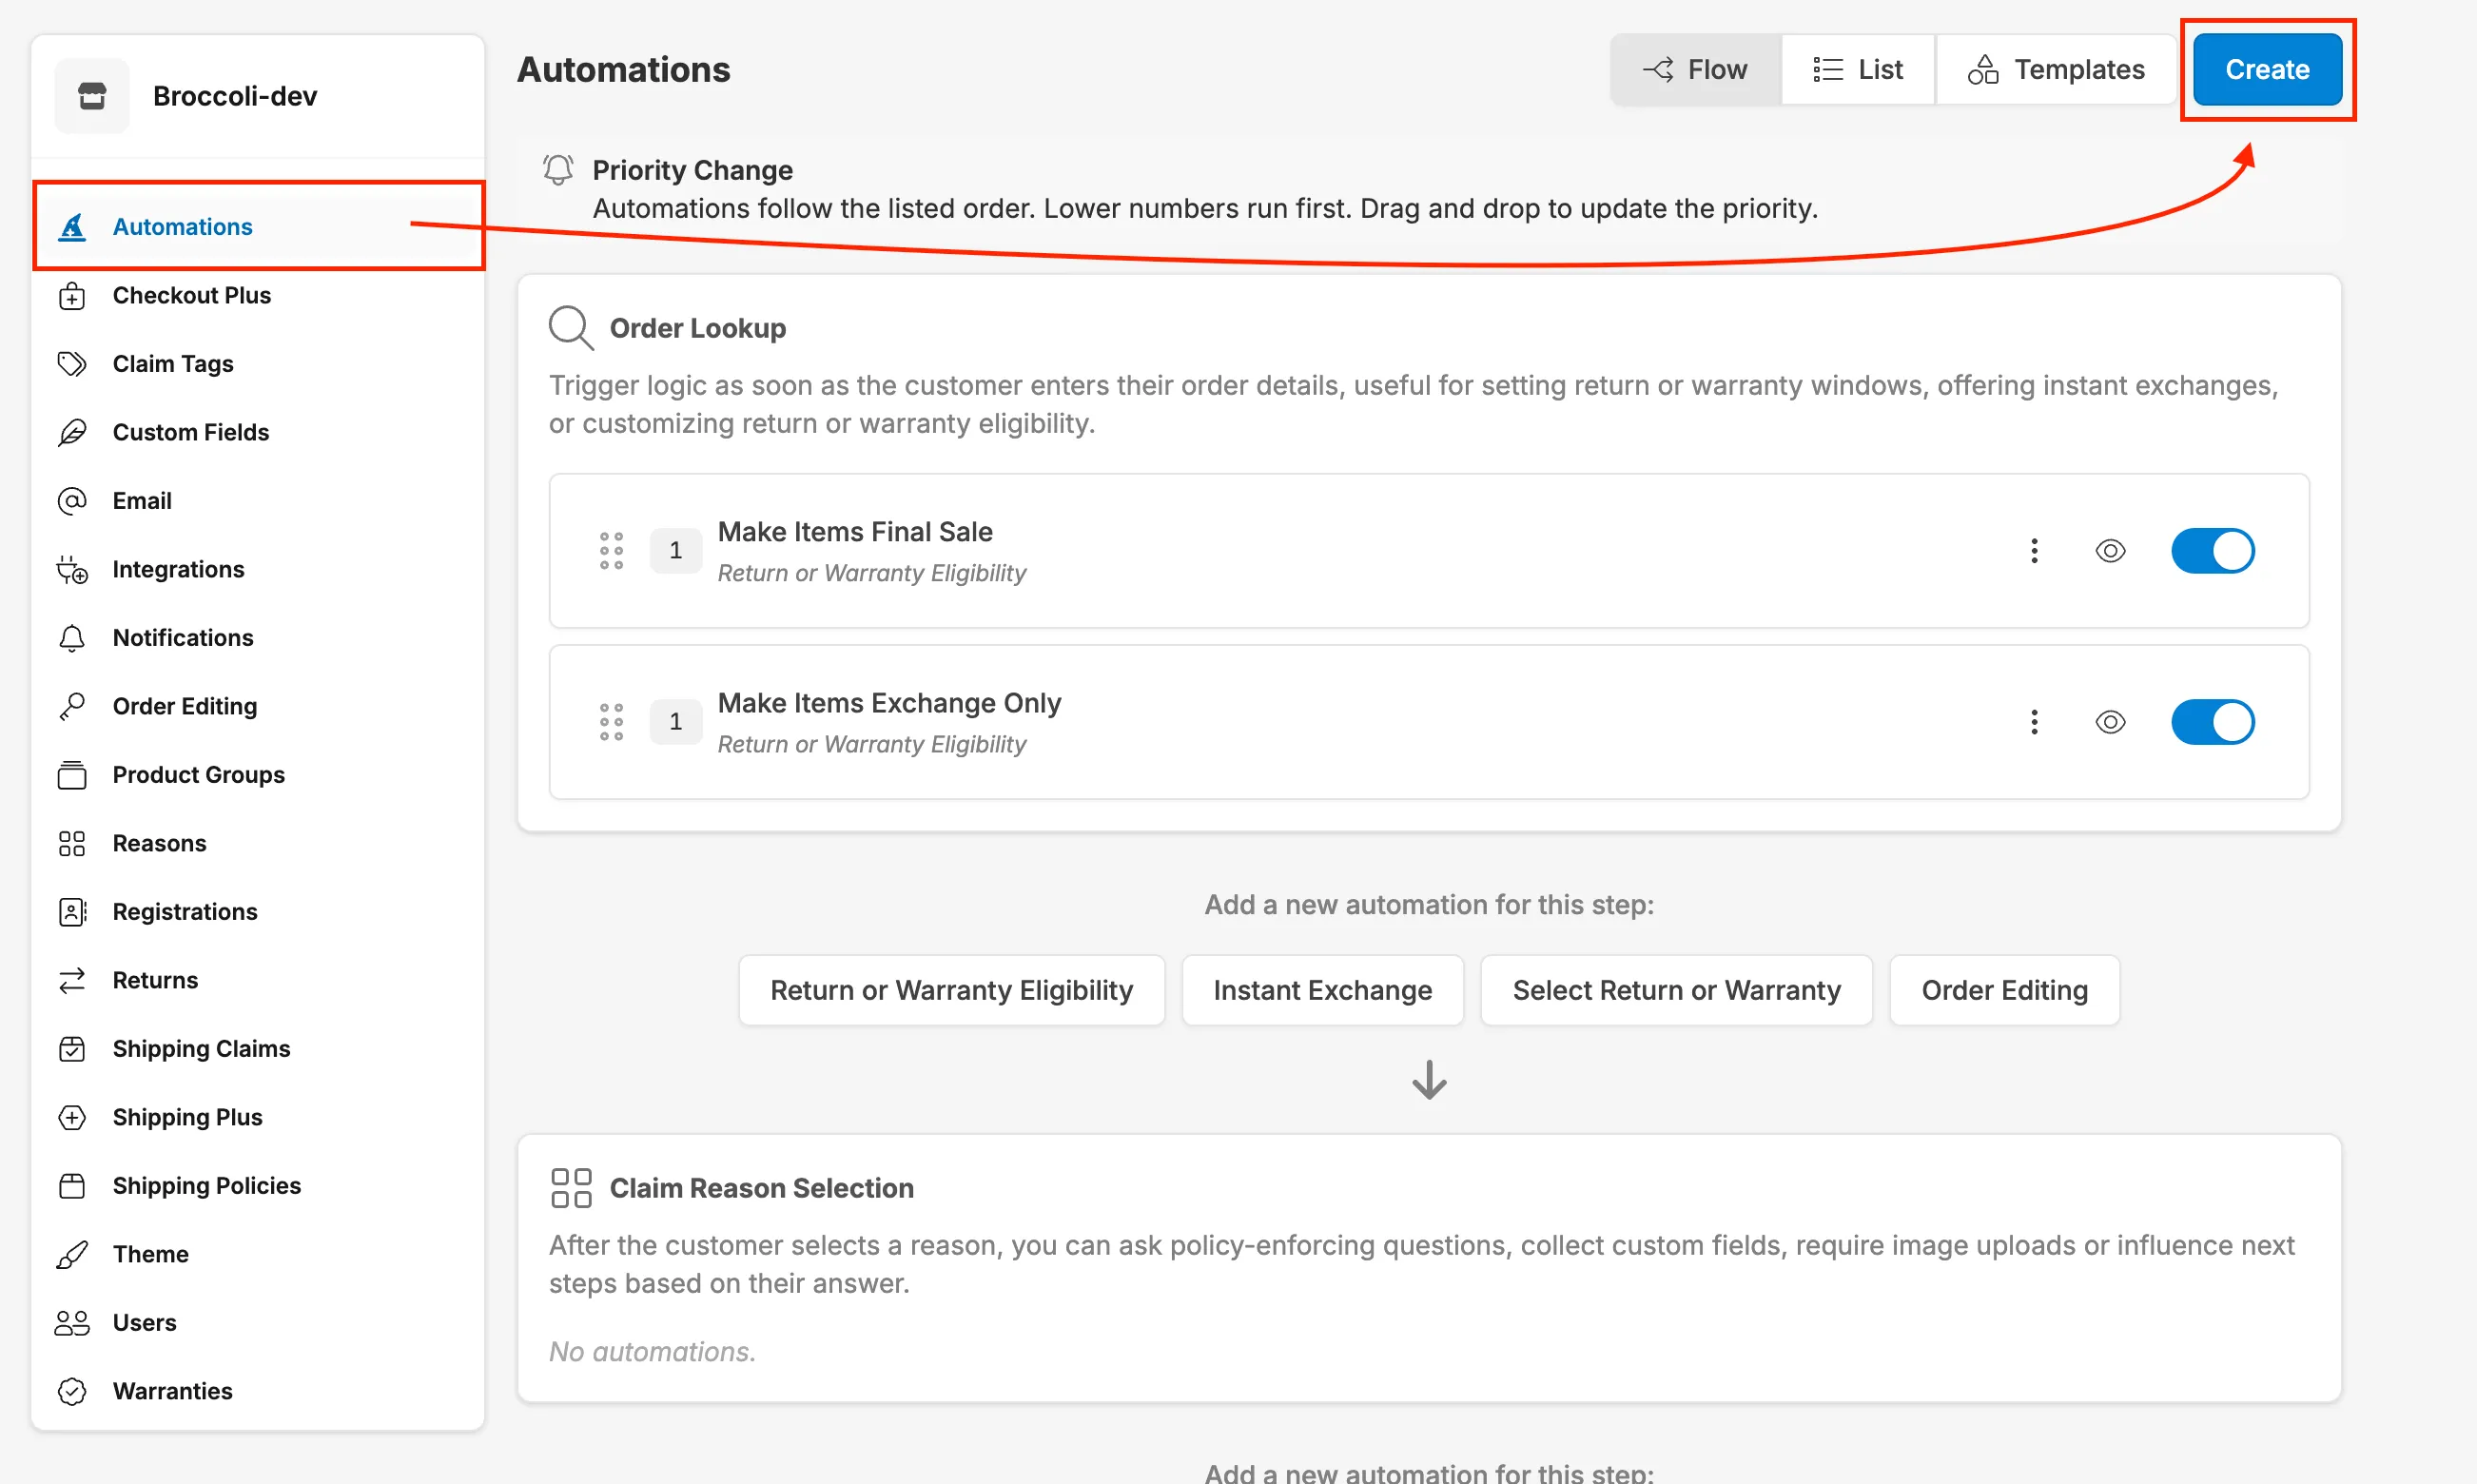
Navigate to Settings → Automations in the Corso Admin
-
Click “Create” in the top right corner
- Select “Customize Claim Inspections” from the list of actions
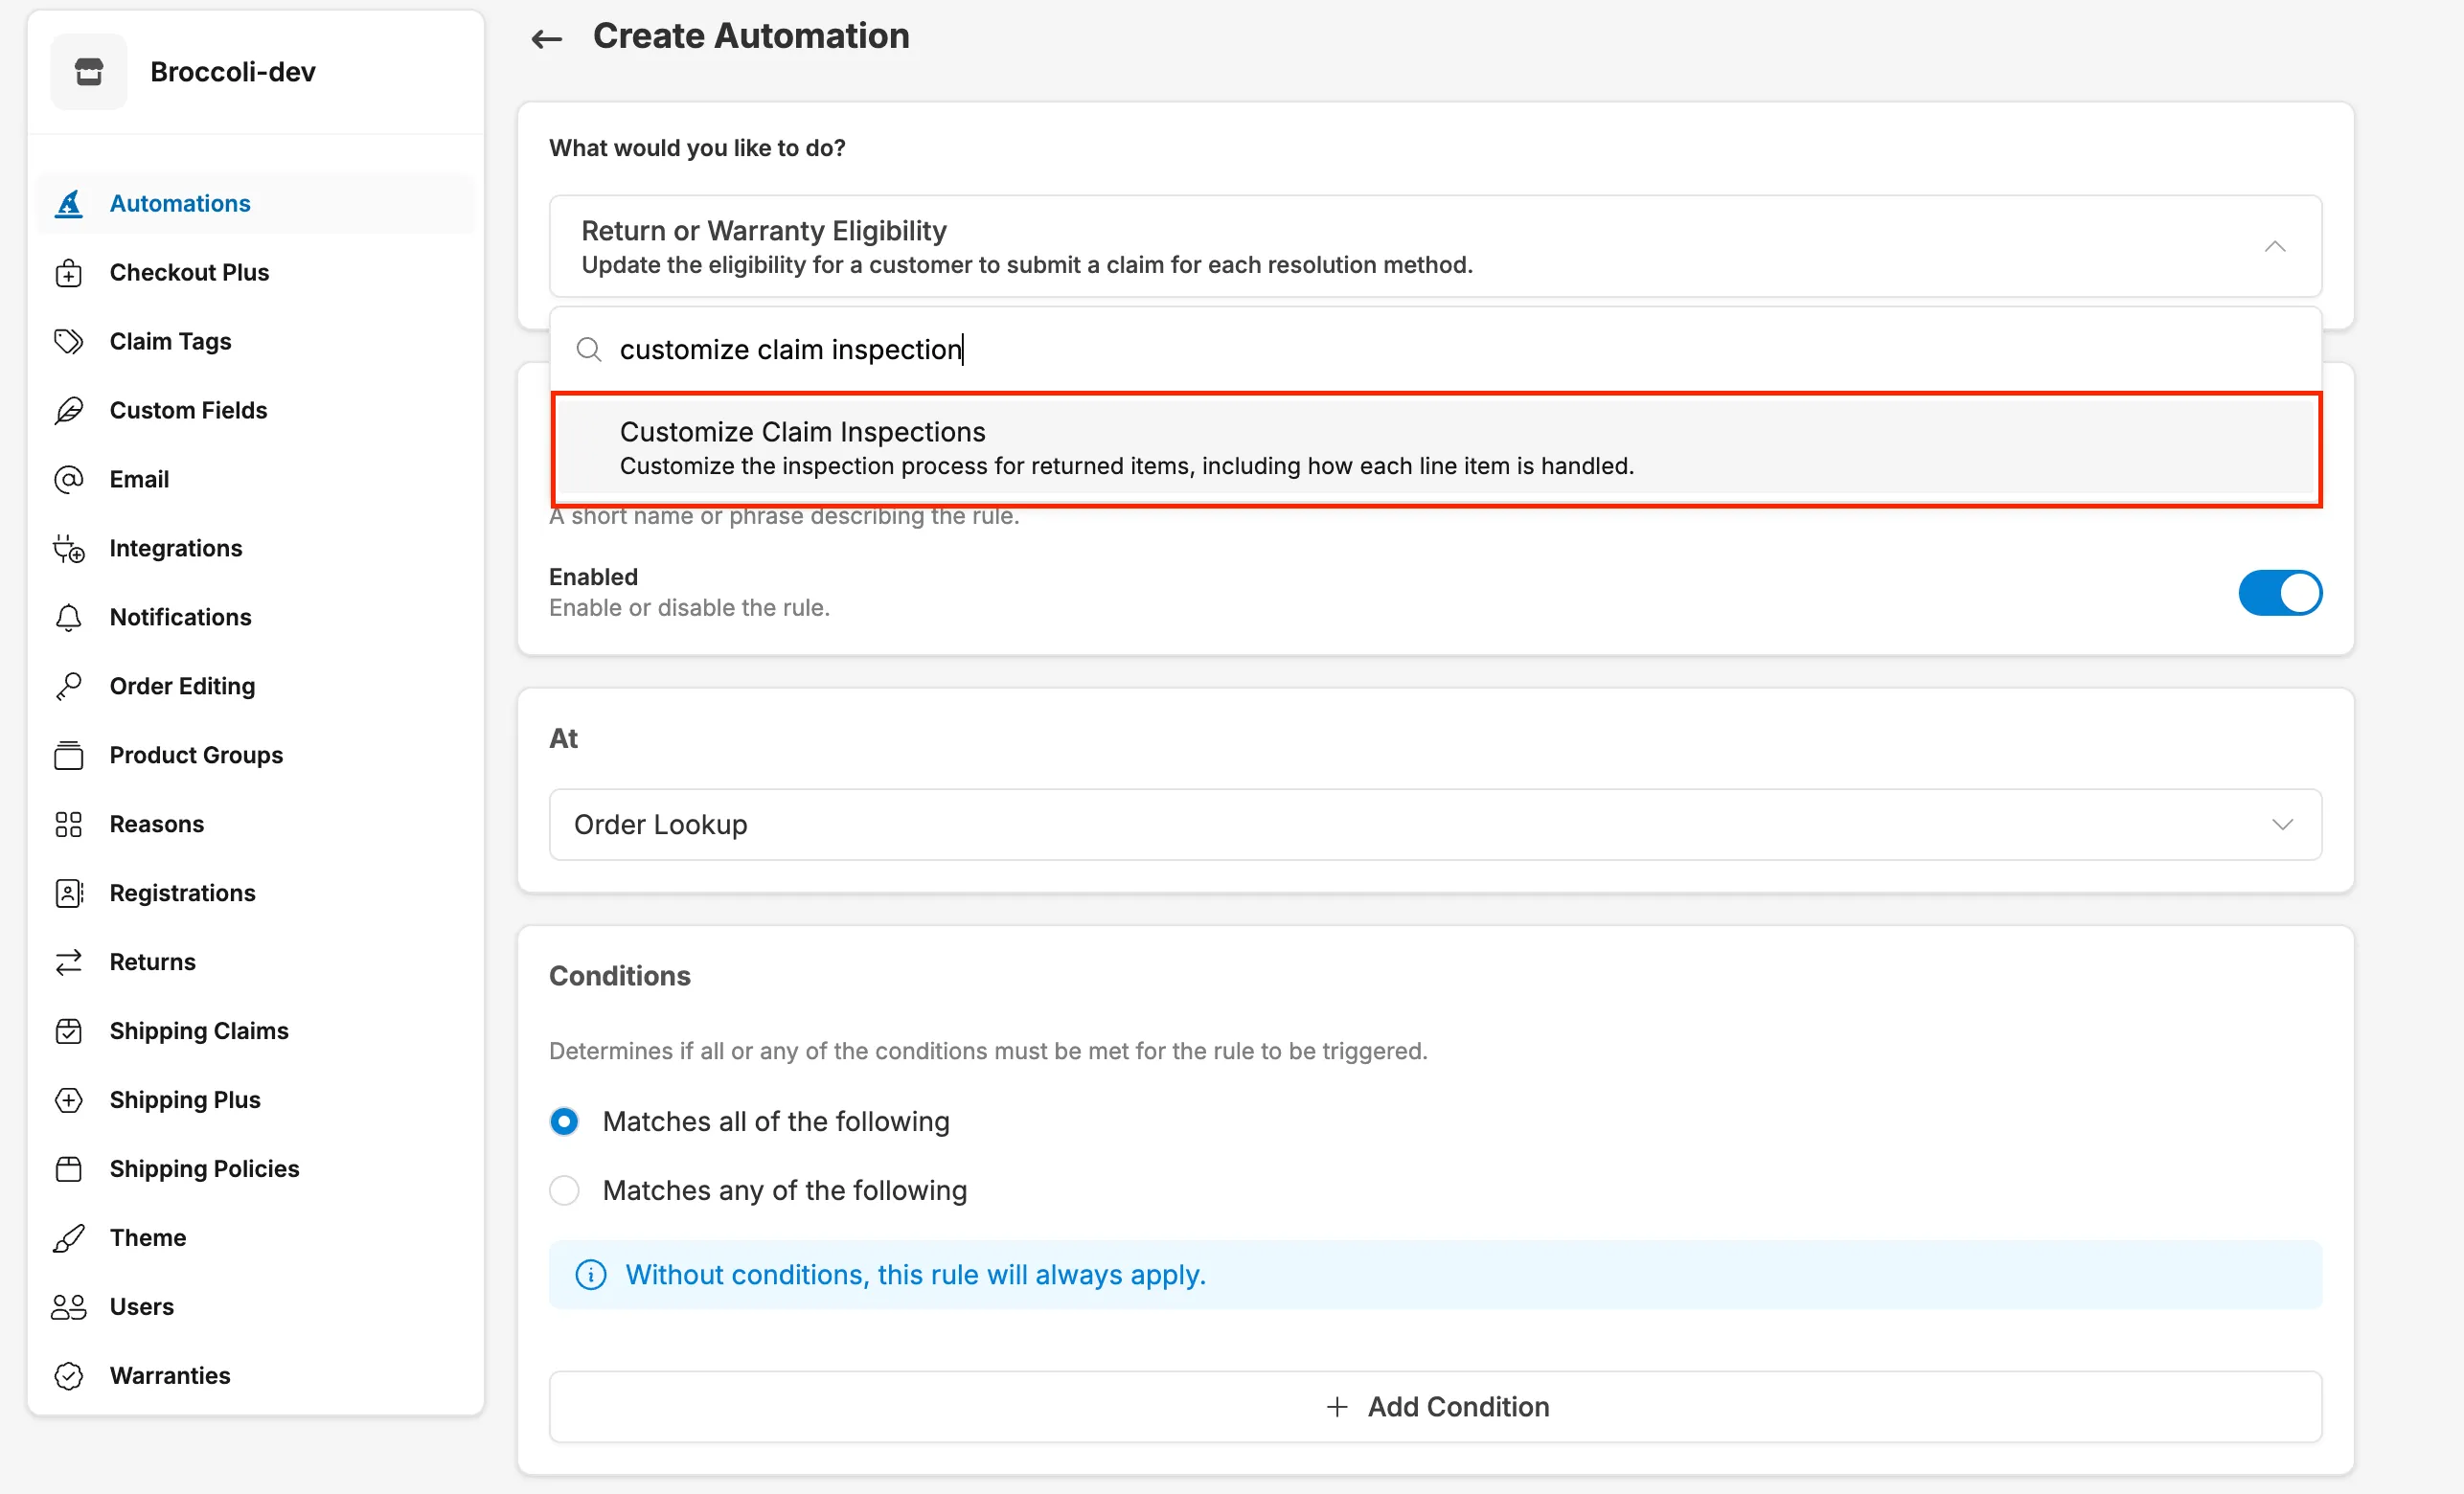
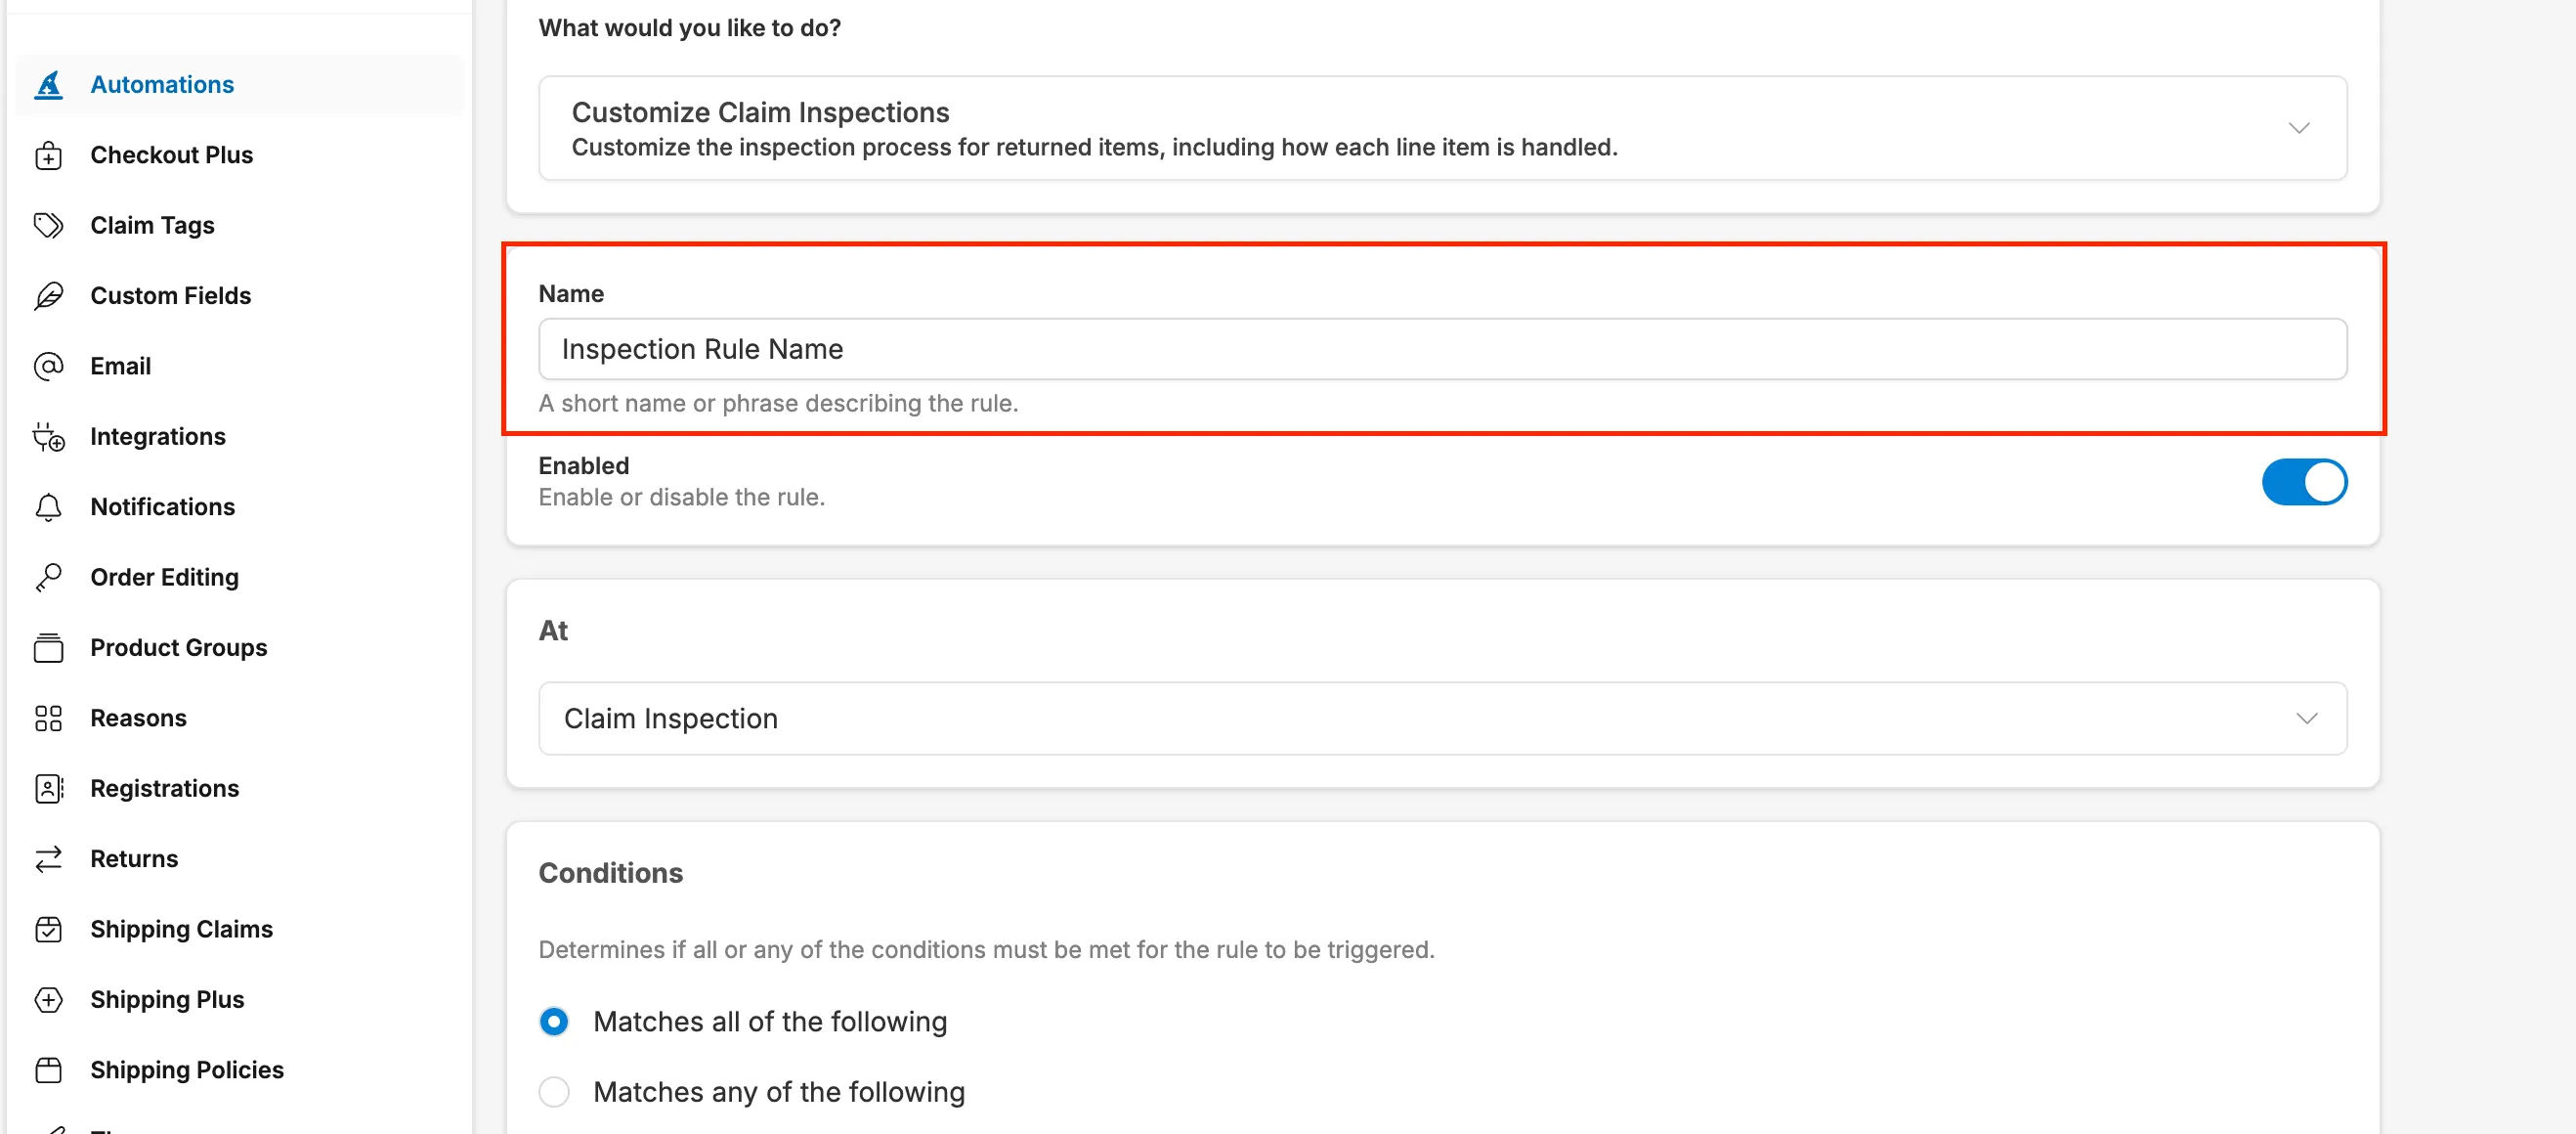
- Name your rule (e.g., “Defective Product Inspection” or “Open Box Verification”)
Note: You will enable/disable the rule directly under the name
At this point, you can:
Section titled “At this point, you can:”Define Conditions for when the inspection should trigger:
- Claim reason (e.g., “Defective”)
- Custom field responses (e.g., “Was product opened?” = “Yes”)
- Product groups or specific products
- Claim value (e.g., total > $100)
- Order attributes (tags, country, etc.)
AND
Configure Inspection Requirements:
- Add condition assessment questions (Yes/No, select options)
- Set up inspection grading (Grade A-D for restock logic)
- Require internal notes field
- Require photo uploads (specify minimum number)
- Add custom verification questions
Then click Save and ensure the rule is Enabled
Customizing Inspections
Section titled “Customizing Inspections”Create Multiple Rules for Different Scenarios
Section titled “Create Multiple Rules for Different Scenarios”You can create multiple inspection rules that apply to different situations:
Example 1: Defective Items
- Condition: Claim Reason = “Defective”
- Inspection: Verify defect, require 2 photos, add notes
Example 2: High-Value Returns
- Condition: Claim Total > $200
- Inspection: Check authenticity, verify packaging, require 4 photos
Example 3: Open Box Items
- Condition: Custom Field “Product Condition” = “Opened”
- Inspection: Check for wear, verify completeness, assign restock grade
Stacked Inspections
Section titled “Stacked Inspections”If a claim meets multiple rule conditions, you can complete all applicable inspections. For example, an item that is both “Defective” AND “Opened” will trigger both inspection workflows.
Performing Inspections
Section titled “Performing Inspections”Once configured, your team can perform inspections:
- Open a claim in the Corso Admin
- Click the “Inspection” button for the item
- Answer all required questions
- Select inspection grade (if configured)
- Upload required photos
- Add internal notes
- Save the inspection
- Finalize the claim
Q: Are inspections visible to customers?
A: No. Inspections are internal-only and used by your team or warehouse partners.
Q: Can I require multiple inspections on a single claim?
A: Yes. If a claim meets conditions for multiple rules, all applicable inspections will appear.
Q: Can inspection outcomes affect claim approval?
A: Yes. Inspection data can determine restock eligibility, fee application, and whether claims are approved or denied.
Q: Do I have to use inspections?
A: No. Inspections are optional. Leave the toggle off in settings if you don’t need them.