Building Automation Rules
Overview
Section titled “Overview”The Corso Automations Engine gives you complete control over your return and warranty workflows through powerful, easy-to-build rules. Instead of manually managing every claim or maintaining policies, you can create intelligent automations that adapt to your business needs. Whether you want to charge fees based on claim type, offer instant exchanges to VIP customers, or automatically finalize certain returns, automation rules let you customize your entire post-purchase experience.
What You Can Expect
Section titled “What You Can Expect”By building automation rules, you can:
- Reduce manual work: Automate repetitive tasks like charging fees, tagging claims, or finalizing resolutions.
- Create flexible policies: Apply different rules based on customer type, product category, order details, or claim reasons.
- Improve customer experience: Provide faster resolutions with instant exchanges, auto-finalization, and smart routing.
- Protect revenue: Enforce return windows, apply handling fees, or block returns on final sale items.
- Streamline operations: Route returns to the correct warehouse, auto-tag claims for team workflows, or collect custom information.
Automation rules save time, reduce support costs, and give you the flexibility to handle edge cases without changing your entire return policy.
Getting Started with Automations
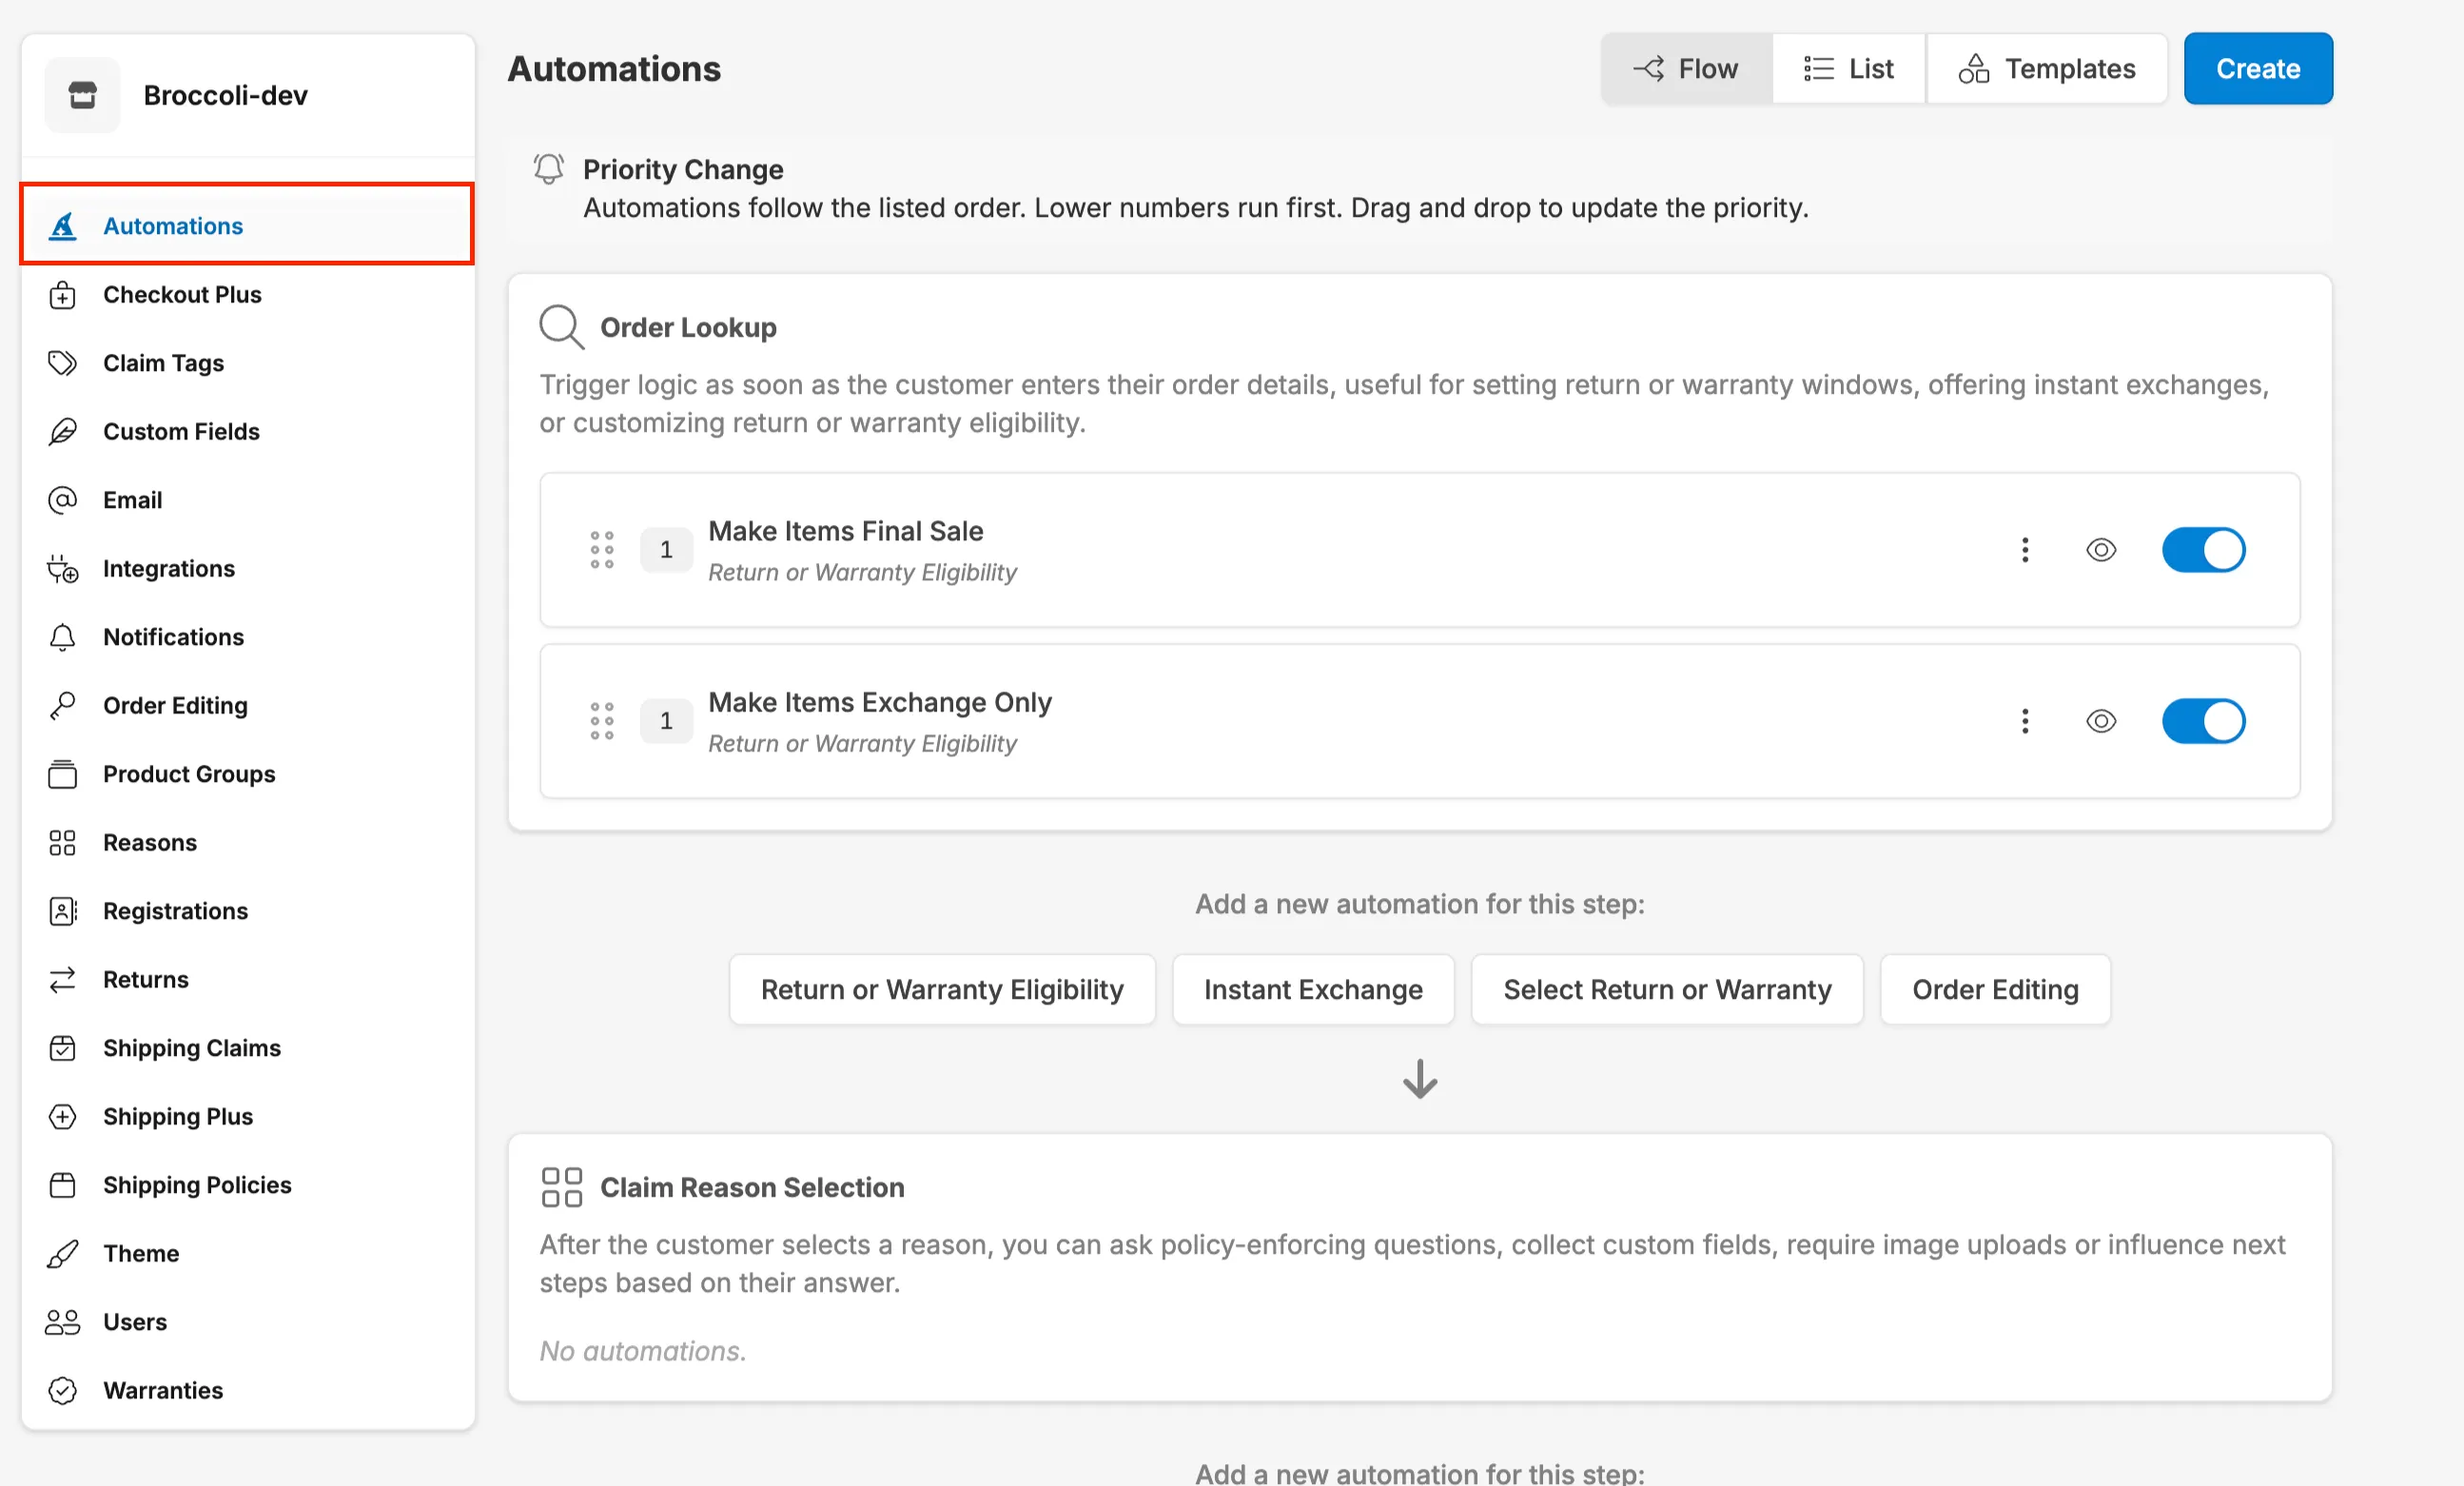
Section titled “Getting Started with Automations”Navigate to Settings → Automations within the Corso admin to view and manage all your automation rules. From here, you can create new rules, edit existing ones, activate or deactivate them, and view detailed overviews of how each rule functions.
Starting from a Template
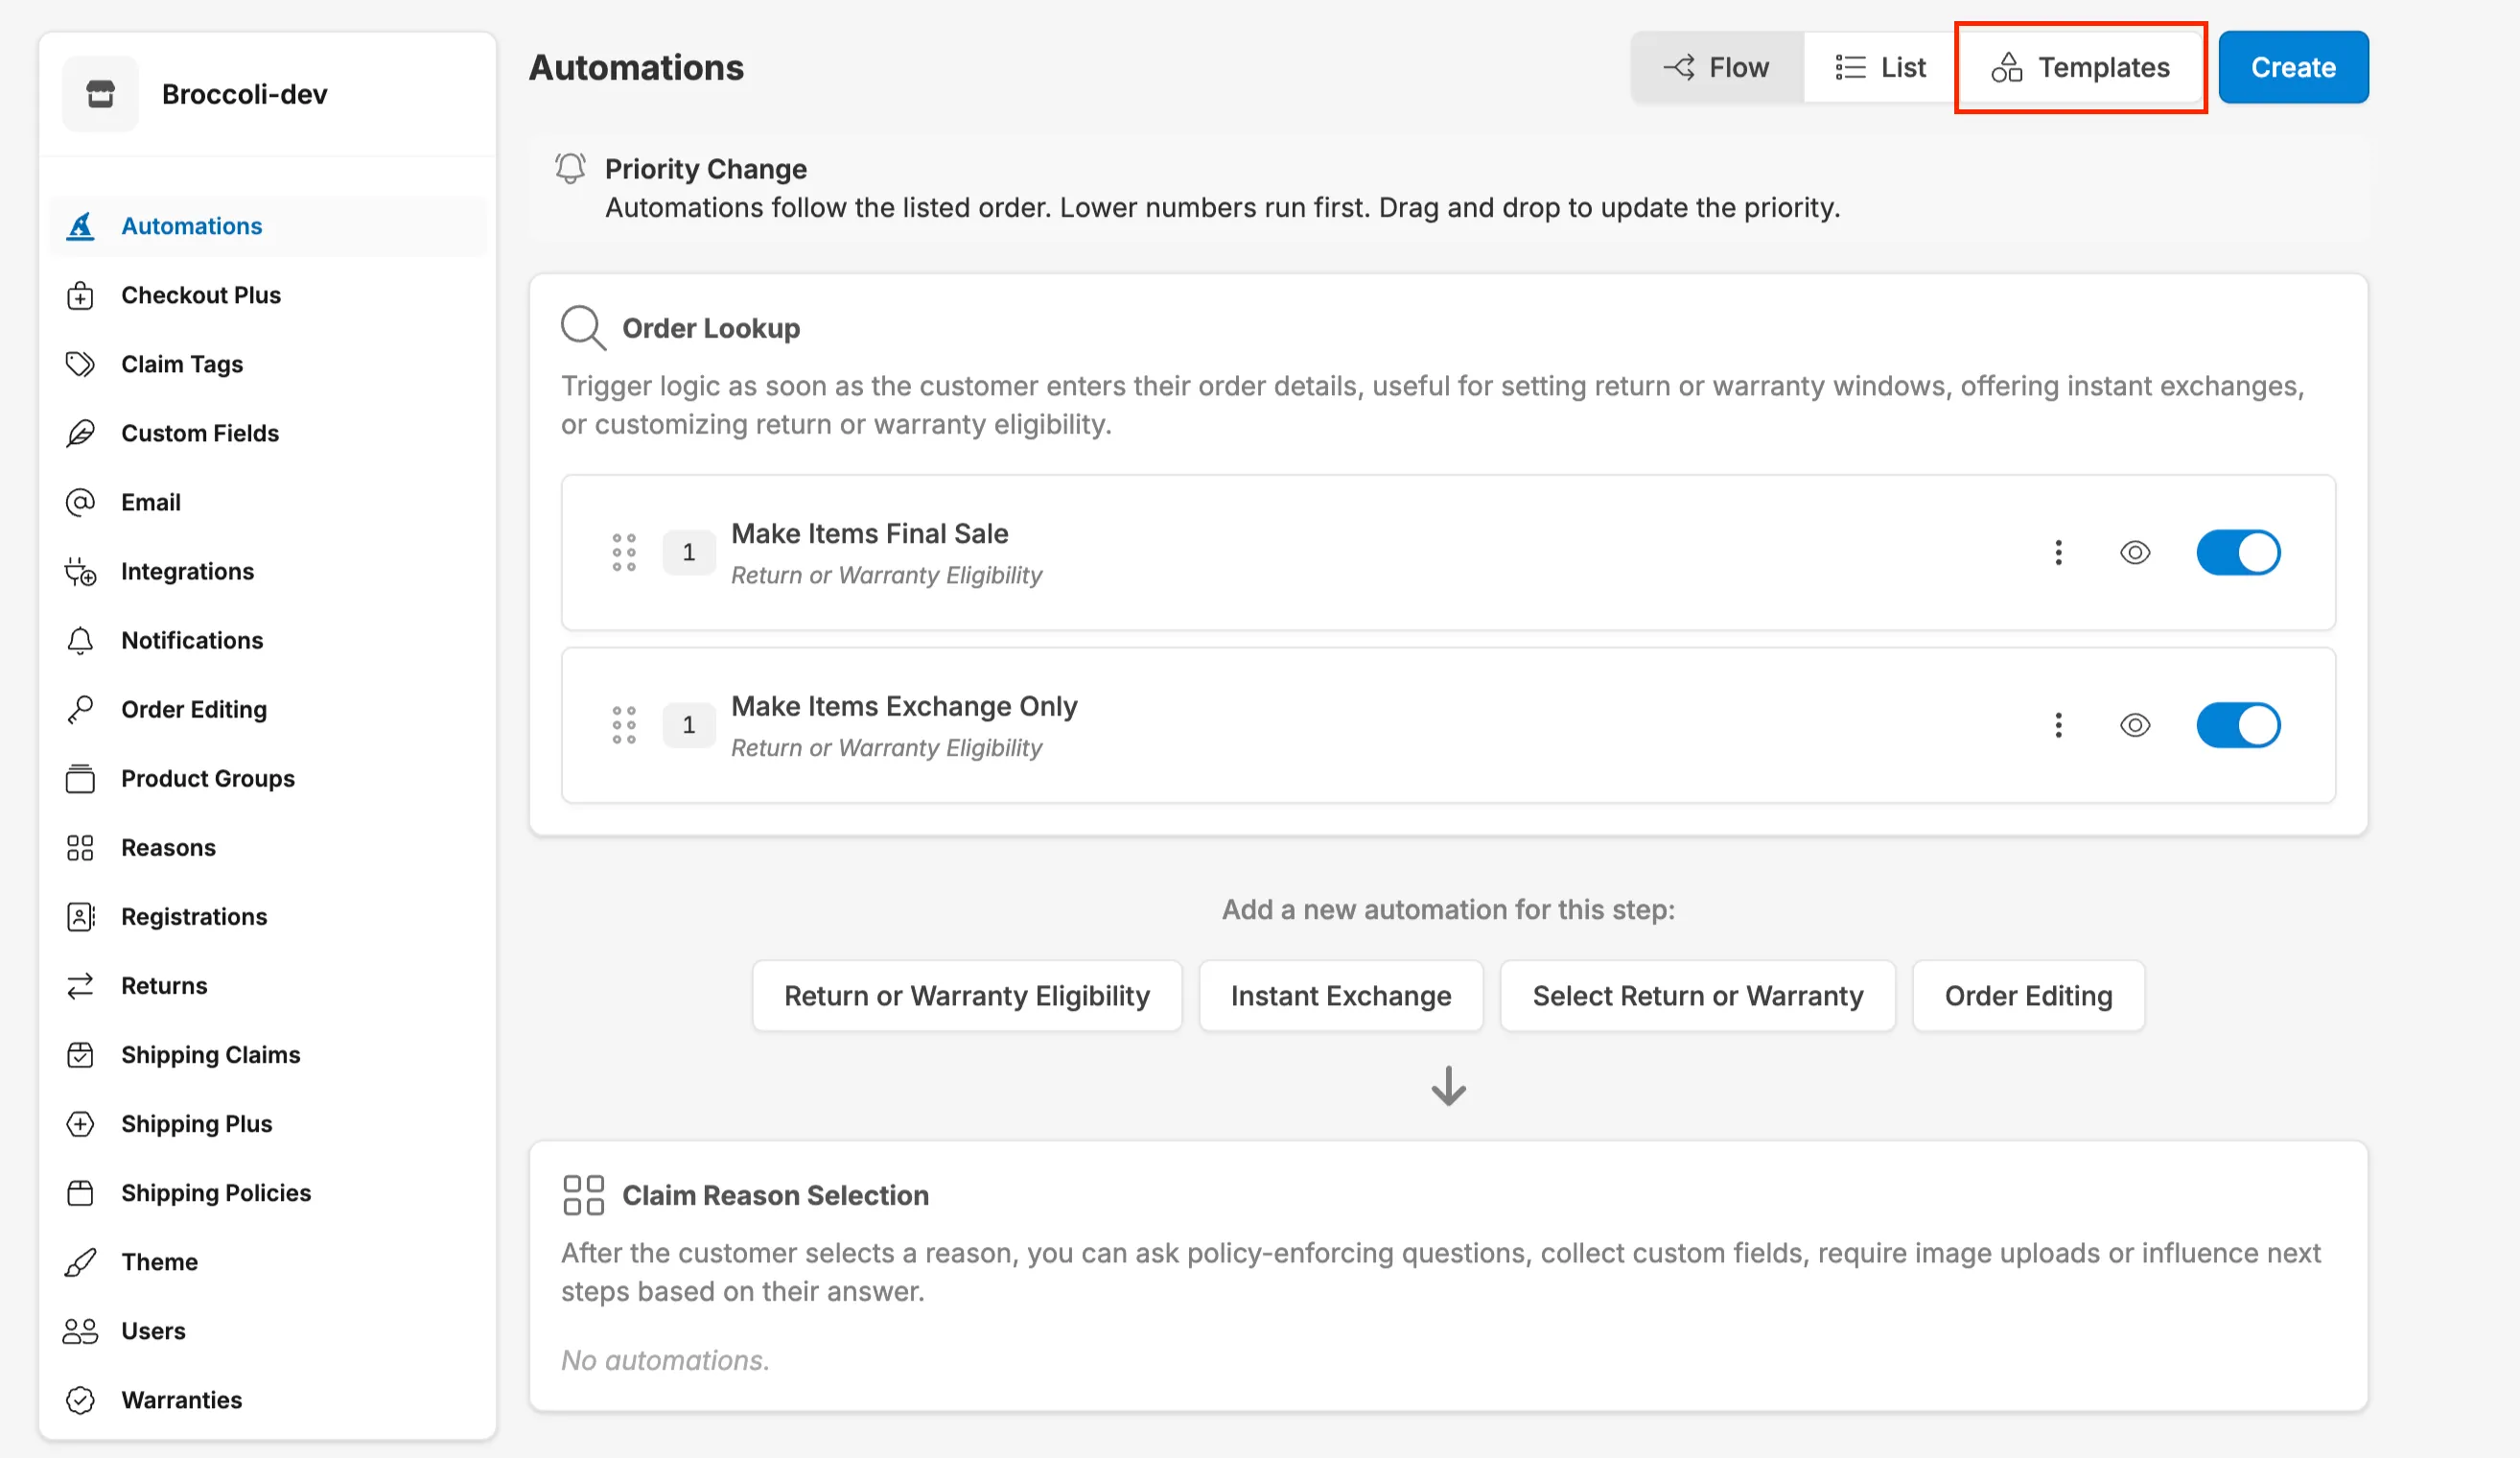
Section titled “Starting from a Template”When building your first automation rule, navigate to Automations → Templates for templates that provide a quick starting point for common scenarios.
Corso offers pre-built templates for:
- Charge Handling Fee for Refunds: Apply a handling fee when customers choose a refund instead of an exchange.
- Make Items Final Sale: Prevent selected items from being eligible for return or exchange.
- Make Items Exchange Only: Restrict selected items to exchange-only resolutions.
- Charge Return Label Cost on Unprotected Orders: Charge the return label cost when processing returns for unprotected orders.
- Charge Return Label Cost on Protected Order Refunds: Charge the return label cost when refunding protected orders.
- Deduct Shipping Cost from Refund Total: Subtract the original shipping cost from the total refund amount.
- Charge for Exchange Order Shipping: Charge customers for the shipping cost of exchange orders.
- Waive Fees on Defective Items: Automatically waive applicable fees for items marked as defective.
- Offer Instant Exchanges to US Customers: Allow eligible US customers to receive instant exchange options.
- Block Exchanges for International Orders: Prevent customers with international orders from selecting exchange resolutions.
- Charge Shipping on Exchange of Exchange Orders: Apply shipping charges when an exchange order is exchanged again.
- Finalize Gift Cards and Exchanges on Return Shipment In Transit: Automatically finalize gift cards or exchanges once the return shipment is marked in transit.
Templates come pre-configured with conditions and actions, which you can customize to match your specific needs.
Building from Scratch
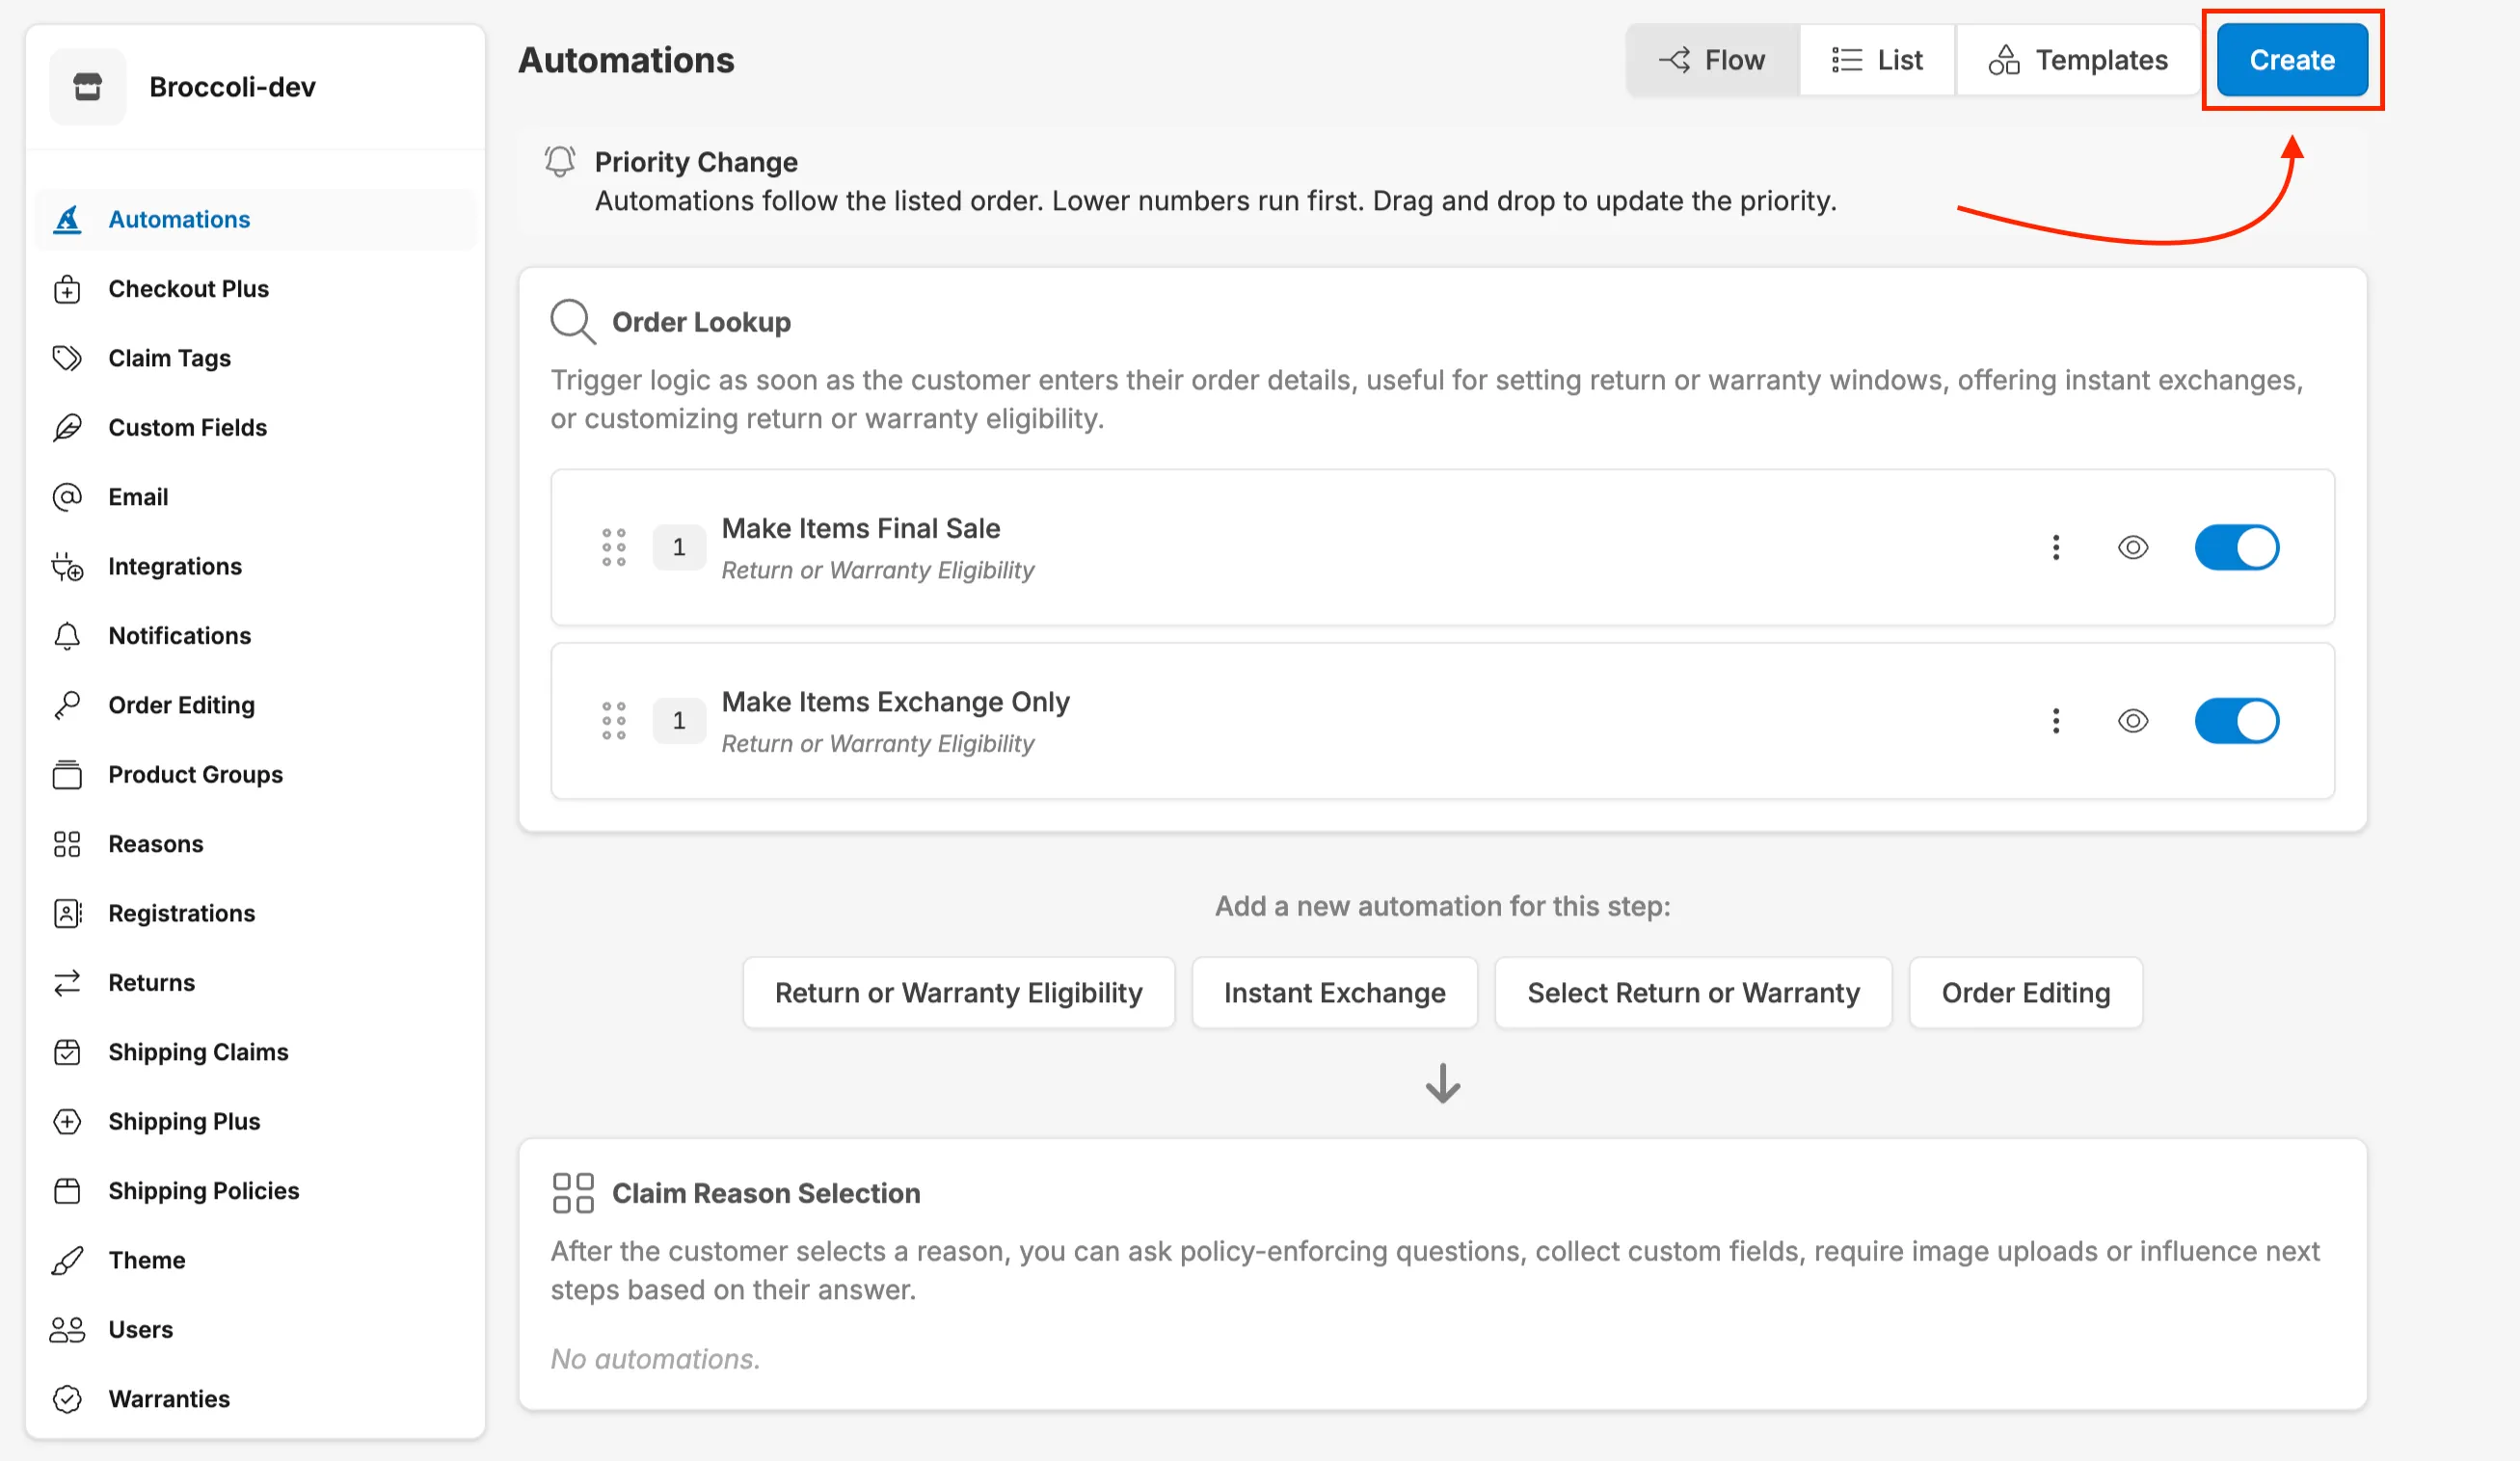
Section titled “Building from Scratch”If you prefer full control, you can start with an action and build out your rule from the ground up. Navigate to Automations → Create.
Select the dropdown menu.
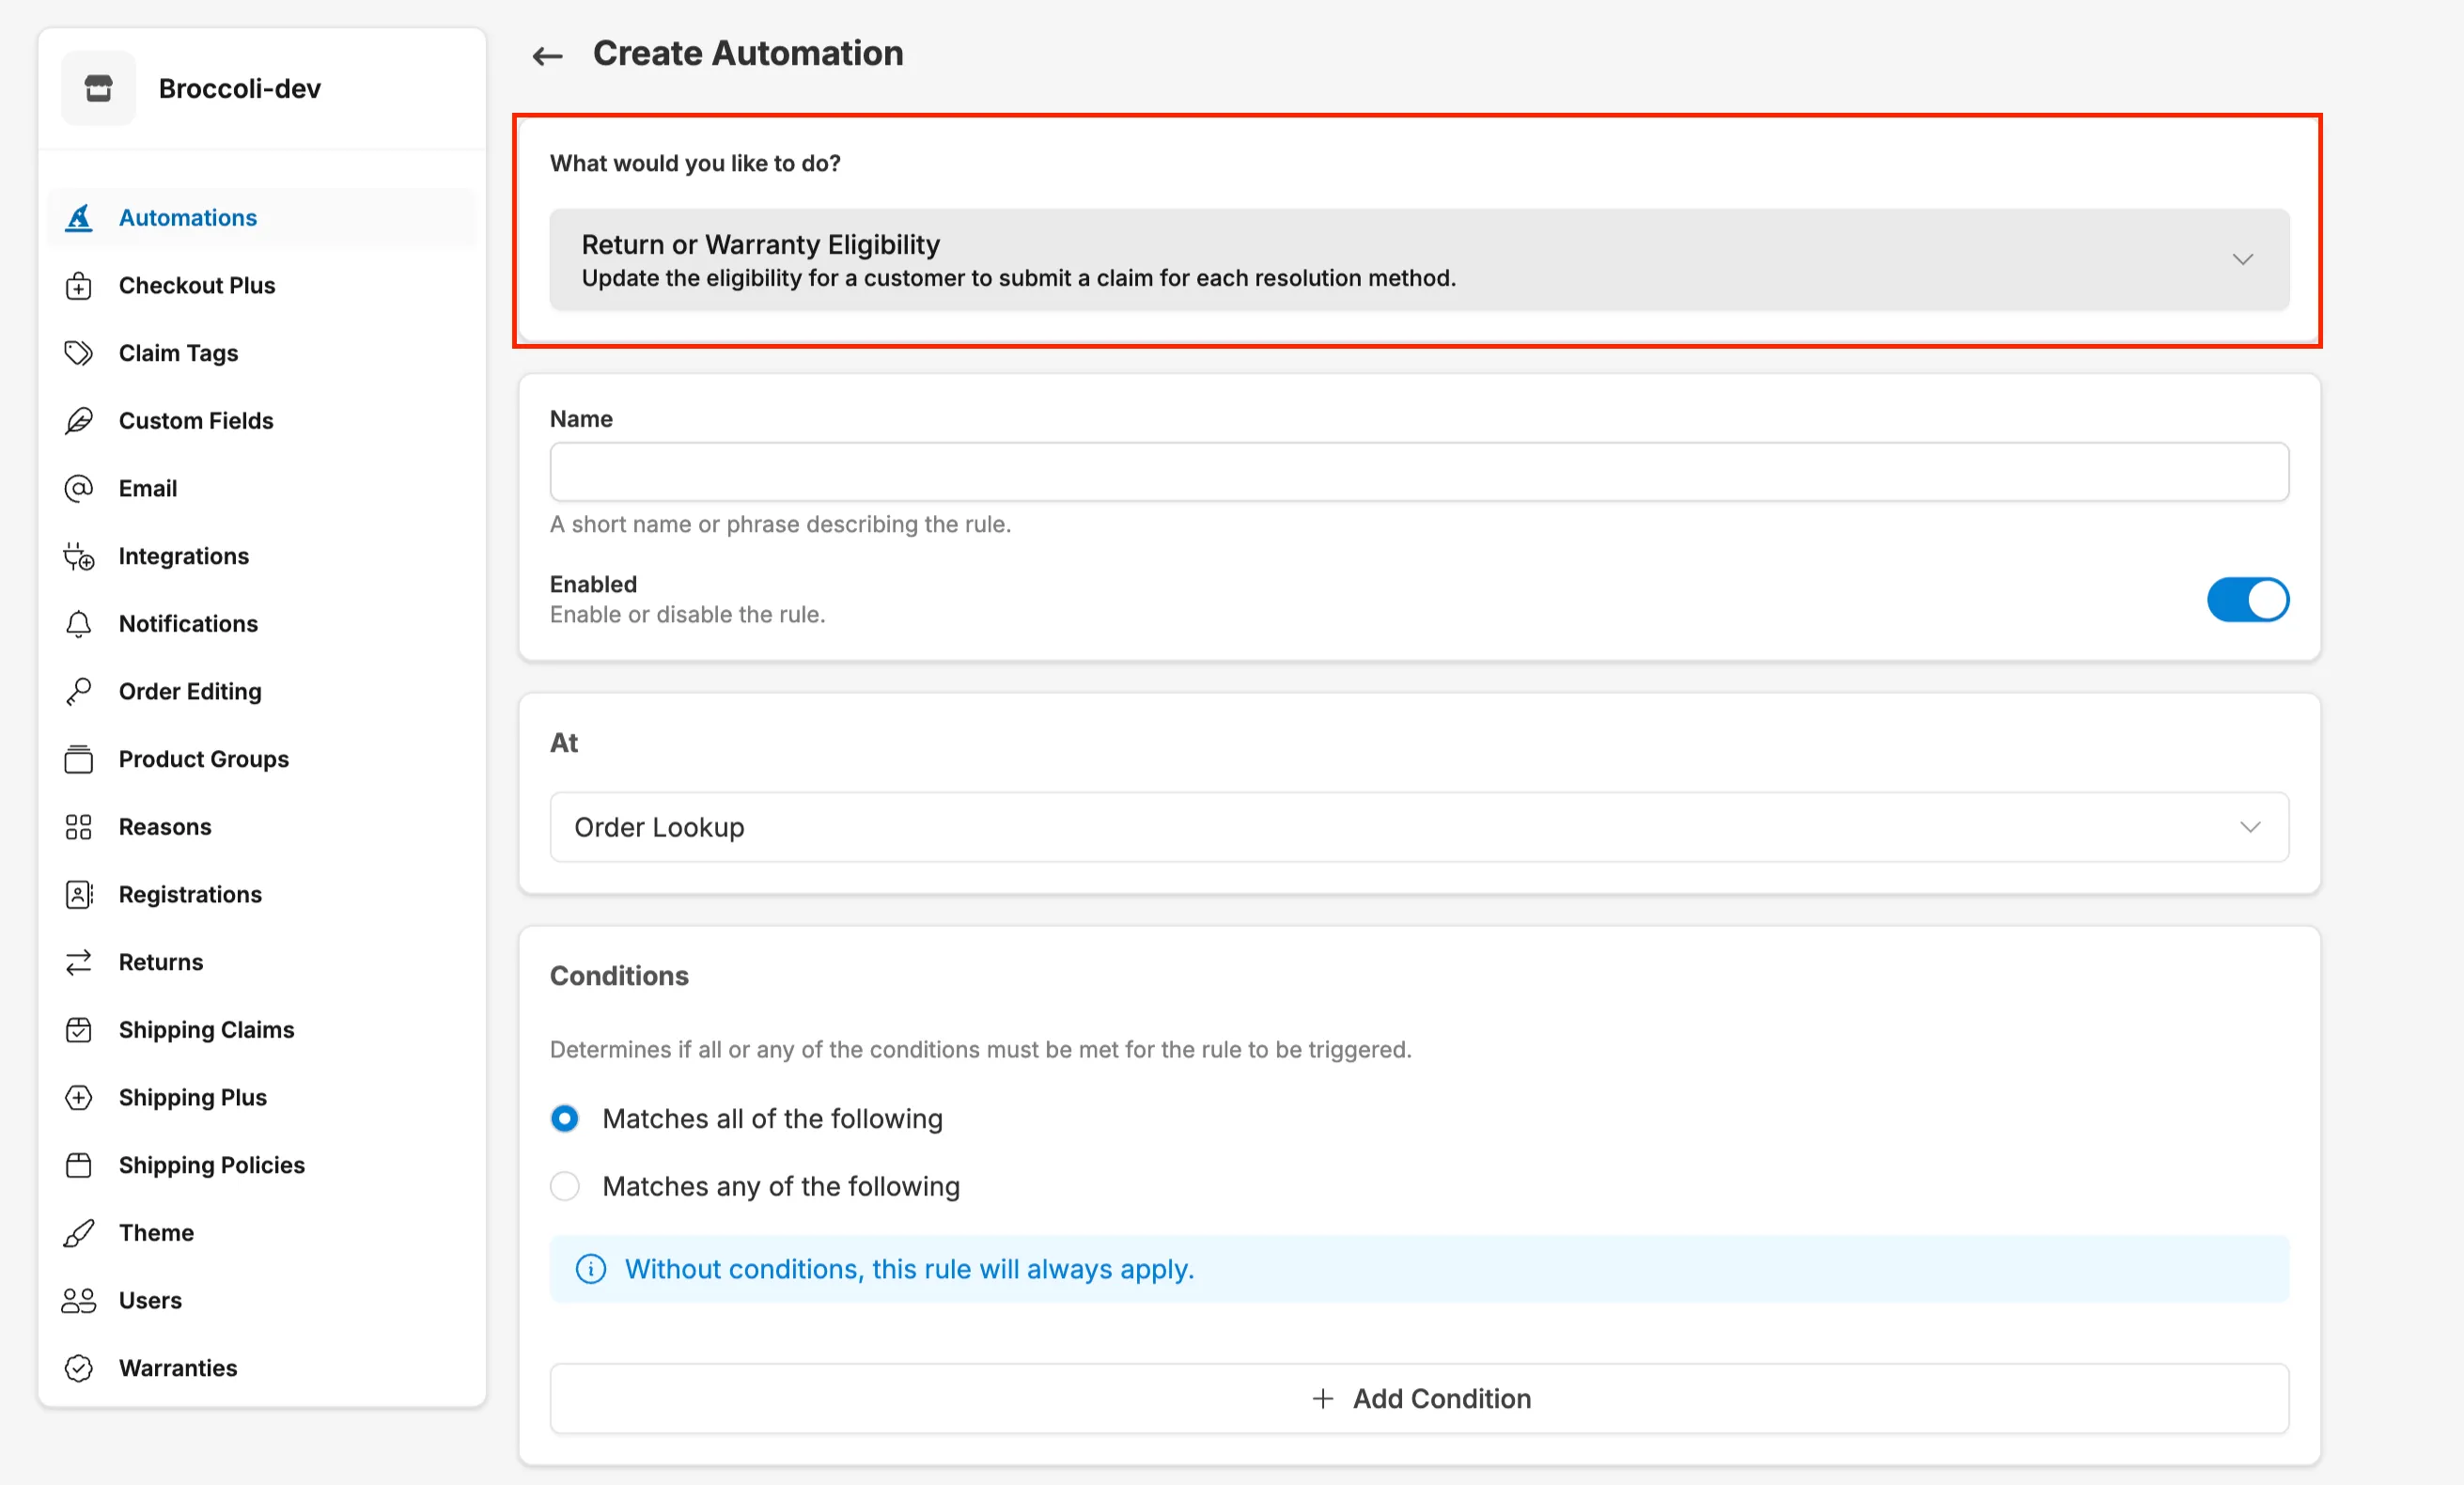
Choose one of the available automation actions including:
- Apply Or Waive A Fee: Dynamically apply or waive a fee on the claim.
- Auto-Finalize Claim: Automatically finalize a claim.
- Charge For Exchange Order Shipping: Charge for the cost of the exchange order shipping, including applying a markup.
- Charge For Return Label: Charge the cost of a return label, including applying a markup.
- Collect Additional Information: Modify the information collected during the claim process, including custom fields and media uploads.
- Configure Out Of Stock: Customize the finalization process for claims, including what happens in out-of-stock scenarios.
- Customize Claim Inspections: Customize the inspection process for returned items, including how each line item is handled.
- Gift Card Incentive: Modify or apply gift incentives.
- Instant Exchange: Allow a customer to exchange an item instantly without waiting for the original item to be returned.
- Manual Review: Manually review a claim before issuing a packing slip or label.
- Order Editing: Allow customers to request changes to their order, such as cancellation or shipping address updates.
- Policy Enforcing Question: Ask a yes/no question to enforce requirements for your return policy.
- Product Exchange: Allow a customer to exchange for a different product.
- Register A Product: Define which products are eligible for registration by sales channel.
- Restock Inventory: Determine restock behavior for returned items.
- Return Or Warranty Eligibility: Update the eligibility for a customer to submit a claim for each resolution method.
- Return Shipping Policy: Configure where customers return items, and whether to use return labels or packing slips.
- Select Return Or Warranty: Allow the customer to select between a Return or Warranty, when both are available.
- Tag Claim: Add tags to the claim in Corso, useful for tracking or reporting.
- Tag Order: Add tags to the order in Shopify, useful for tracking or reporting.
How Automation Rules Work
Section titled “How Automation Rules Work”Every automation rule is built with two main components: Conditions and Actions.
Conditions
Section titled “Conditions”Conditions define when a rule should apply. You can create highly targeted rules by combining multiple conditions, or leave conditions blank to apply the rule universally. Common condition types include:
- Order Details: Order date, order total, order country, order tags, fulfillment location.
- Customer Information: Customer tags, first-time vs. repeat customers, VIP status.
- Product Details: Product type, product tags, SKU, price, or product groups.
- Claim Details: Resolution method (refund, exchange, store credit), claim reason, reason detail.
- Shipment Events: Return label scanned, item delivered to warehouse, RMA events.
- Registration Details: Whether a product is registered, registration date, warranty expiration.
You can combine conditions with AND/OR logic to create precise targeting. For example:
- Order country = United States AND Order total > $100: Apply a rule only to large domestic orders.
- Product type = Apparel OR Product type = Footwear: Apply a rule to multiple product categories.
If no conditions are set, the rule will always apply to every claim.
Actions
Section titled “Actions”Actions define what happens when the rule’s conditions are met. Depending on the automation type, actions might include:
- Charging or waiving fees
- Modifying return windows or eligibility
- Auto-finalizing claims
- Tagging claims or orders
- Blocking certain resolution methods
- Offering instant exchanges
- Collecting custom information from customers
Rule Priority
Section titled “Rule Priority”When you have multiple rules of the same type, order matters. Rules are evaluated from top to bottom, and the first rule that matches the conditions will apply. You can drag and drop rules in the Corso admin to adjust their priority.
Example: If you have two fee rules—one that waives fees for VIP customers and one that charges $10 for all refunds—place the VIP rule above the general fee rule. Otherwise, the $10 fee will apply to everyone, including VIPs.
Common Use Cases
Section titled “Common Use Cases”Use Case 1: Charge Handling Fees for International Refunds
Section titled “Use Case 1: Charge Handling Fees for International Refunds”Scenario: You want to charge a $15 handling fee for refunds on international orders to offset return shipping and processing costs.
Setup:
- Go to Automations → Apply or Waive a Fee.
- Create a new rule titled “International Refund Handling Fee”.
- Add conditions:
- Resolution method = Refund
- Order country ≠ United States
- Set fee amount to $15.
- Save and enable the rule.
Result: Customers requesting refunds on international orders will see a $15 handling fee deducted from their refund total. Exchanges and domestic orders are unaffected.
Use Case 2: Make Sale Items Exchange-Only
Section titled “Use Case 2: Make Sale Items Exchange-Only”Scenario: Items purchased during a sale can be exchanged but not refunded.
Setup:
- Go to Automations → Modify Claim Windows.
- Create a new rule titled “Sale Items - Exchange Only”.
- Add conditions:
- Product tags include “Sale”
- Set options:
- Refund window = 0 days
- Exchange window = 30 days
- Save and enable the rule.
Result: Customers who purchased sale-tagged items can exchange them within 30 days but cannot request refunds.
Use Case 3: Auto-Finalize Exchanges When Return Label is Scanned
Section titled “Use Case 3: Auto-Finalize Exchanges When Return Label is Scanned”Scenario: To improve customer experience, you want to ship replacement items as soon as the customer drops off their return, rather than waiting for it to arrive at your warehouse.
Setup:
- Go to Automations → Set Claim Auto-Finalization Options.
- Create a new rule titled “Auto-Finalize Exchanges on Transit”.
- Set trigger to Return Shipment Event.
- Add conditions:
- Resolution method = Exchange
- Return shipment status = In Transit
- Save and enable the rule.
Result: When a customer drops off their return and the carrier scans the label, Corso automatically finalizes the claim and triggers the exchange order to ship.
Use Case 4: Offer Instant Exchanges to VIP Customers Only
Section titled “Use Case 4: Offer Instant Exchanges to VIP Customers Only”Scenario: You want to provide instant exchanges (ship replacement before return arrives) exclusively to your VIP customer segment.
Setup:
- Go to Automations → Set Instant Exchange Options.
- Create a new rule titled “VIP Instant Exchanges”.
- Add conditions:
- Customer tags include “VIP”
- Set the number of days customers have to return the item before being charged (e.g., 7 days).
- Save and enable the rule.
Result: Only customers tagged as VIP in Shopify will see the instant exchange option during their return flow.
Use Case 5: Block Returns on Opened Beauty Products
Section titled “Use Case 5: Block Returns on Opened Beauty Products”Scenario: Due to hygiene regulations, you cannot accept returns on beauty products that have been opened or used.
Setup:
- Go to Automations → Set a Policy Enforcing Question.
- Create a new rule titled “Opened Beauty Product Restriction”.
- Add conditions:
- Product type = Beauty
- Set the question: “Has this product been opened or used?”
- Set the ineligibility message: “For health and safety reasons, we cannot accept returns on opened or used beauty products.”
- Save and enable the rule.
Result: Customers returning beauty products are asked if the item has been opened. If they answer “Yes,” the item is automatically marked ineligible and they see your custom message.
Managing Your Automation Rules
Section titled “Managing Your Automation Rules”Editing Rules
Section titled “Editing Rules”You can modify any automation rule at any time by clicking into it from the Automations page. Changes take effect immediately once saved, so be sure to test your updates before enabling them for live claims.
Activating and Deactivating Rules
Section titled “Activating and Deactivating Rules”Need to temporarily pause a rule? Use the toggle switch on the Automations page to deactivate any rule without deleting it. This is useful for seasonal policies, promotional periods, or testing new workflows.
Viewing Rule Details
Section titled “Viewing Rule Details”Click on any rule to see a detailed breakdown of its conditions, actions, and current status. This helps you quickly audit your automation setup and troubleshoot any unexpected behavior.
Testing Your Rules
Section titled “Testing Your Rules”Before activating a new rule, test it by submitting a claim that matches your conditions. Verify that the expected action occurs (fee applied, tag added, resolution method modified, etc.). If you have multiple rules, ensure priority order works as intended by testing edge cases.
Specific Automation Guides
Section titled “Specific Automation Guides”Once you understand the basics of building automation rules, explore these detailed guides for specific automation types. Each article includes step-by-step setup instructions, use cases, and customer experience details.
Fee Management
Section titled “Fee Management”- Apply or Waive a Fee Modification – Charge or remove fees based on conditions like customer type, claim reason, or product category.
- Charge for Exchange Order Shipping – Bill customers for the shipping cost of their exchange orders with optional markup.
- Charge for Return Label Automation – Pass return shipping label costs to customers, either universally or conditionally.
Claim Processing & Finalization
Section titled “Claim Processing & Finalization”- Auto-Finalization Claim Rule – Automatically finalize claims based on shipment events or warehouse updates.
- Return Shipping Policy Automation – Route returns to specific warehouses and manage return methods (labels vs. packing slips).
- Tag Claim Automations – Auto-tag claims for better organization and team workflow management.
Customer Experience & Incentives
Section titled “Customer Experience & Incentives”- Gift Card Incentives Automation – Offer bonus store credit to encourage customers to choose gift cards over refunds.
- Instant Exchanges – Enable customers to receive replacement items immediately with pre-authorization.
- Policy Enforcing Question Automation – Add yes/no questions that automatically block returns based on customer responses.
Additional Resources
Section titled “Additional Resources”- Final Sale Items – Learn how to mark products as non-returnable using tags or time windows.
Q: Do I need to set conditions for every rule?
No. If you leave conditions blank, the rule will apply universally to all claims. Conditions give you control over when rules trigger.
Q: Can I have multiple rules of the same type?
Yes. You can create as many rules as needed. Just remember that their priority is evaluated top to bottom, so order them accordingly.
Q: What happens if no rules match a claim?
The claim will proceed with your default settings. Automation rules modify or enhance your base configuration but don’t replace it.
Q: Can I test a rule before activating it?
Yes. Create your rule with any conditions you expect to use when your rule is live. Then add one additional condition with your specific email that you have on a test order. This way only an order with your exact email would be able to see the rule and you can test it with test orders. When finished testing simply remove the condition with your email and the rule should be ready to go.
Q: How do I know which rule applied to a specific claim?
Claim details in the Corso admin show which automation rules were triggered, along with any tags, fees, or modifications that were applied.