Allowing Customers to Keep an Item
By using the ‘Allow Customer to Keep Item’ automation, brands have the ability to customize when customers need to send the item back as part of the return, and when they do not. By leveraging automation conditions, they can determine which returns require item(s) to be returned or not.
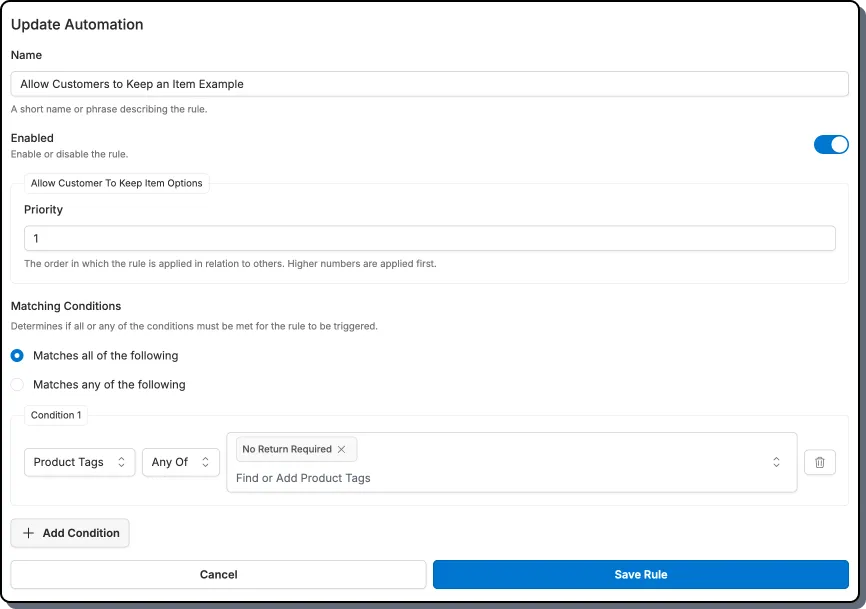
How to Setup
Section titled “How to Setup”Navigate to the Automation rules from within the Corso app, and create a new rule
-
Enter a Rule Name
-
Set a priority
-
Choose Matches ALL/ANY of the following
-
Add Conditions
In this example we are identifying any orders where the product has a tag of ‘No Return Required’.
Examples
Section titled “Examples”Merchant never wants the item back
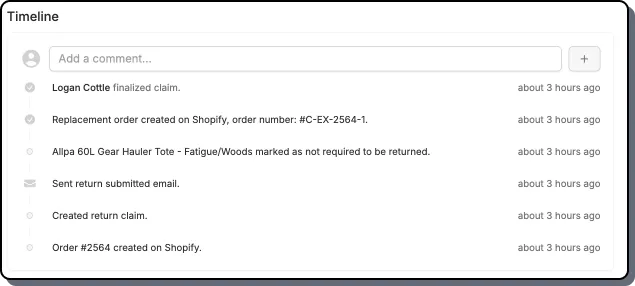
Section titled “Merchant never wants the item back”In this scenario the merchant doesn’t ever want the customer to send the item back as part of resolving the claim (i.e. it’s more expensive to have them pay to ship it back instead of just sending a new one, the item is used and can’t be resold, etc). The timeline will show that a product marked as not required to be returned will be added for any items that fall into this category.
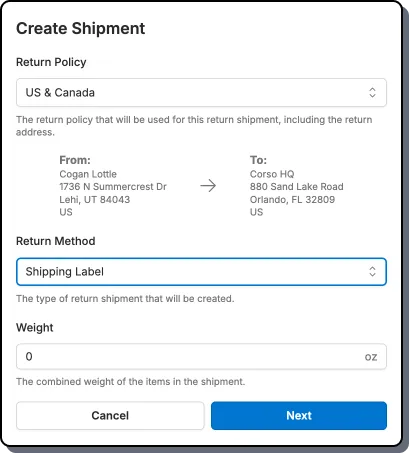
Merchant Reviews Claim before Providing a Return Label
Section titled “Merchant Reviews Claim before Providing a Return Label”In this scenario the merchant doesn’t want to automatically provide a label. Instead, they set up this automation which will trigger the claim creation which they can view in the Merchant Admin and determine whether they want to have the customer send the item back or not. If they decide they need the customer to send it back, they can generate a label in the Merchant Admin to send to the customer.
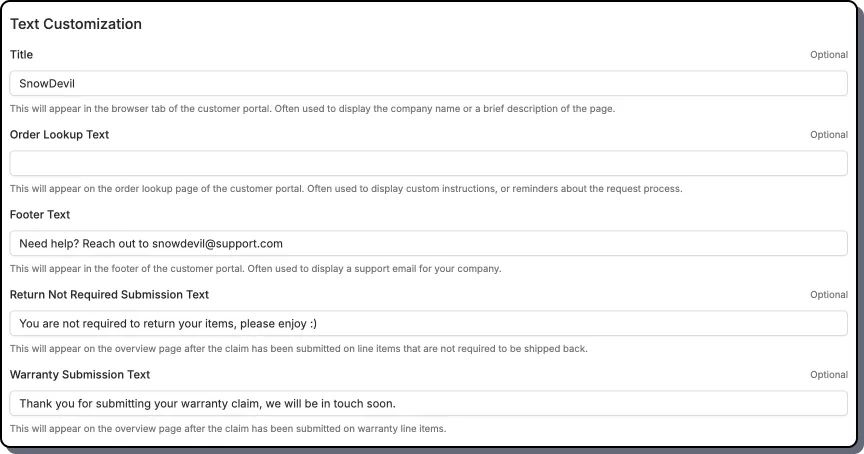
Text Customization
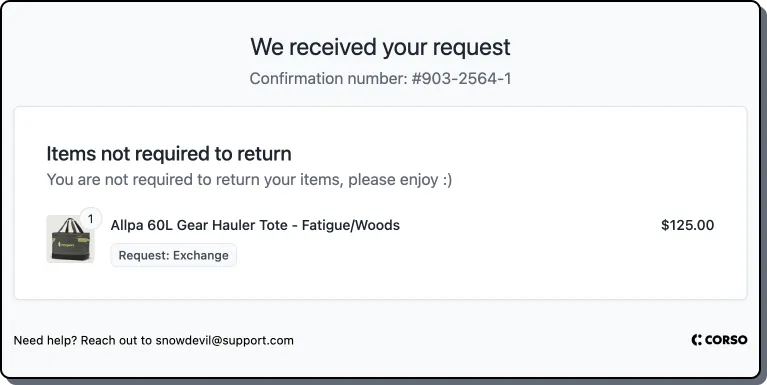
Section titled “Text Customization”Return Not Required Submission Text
Section titled “Return Not Required Submission Text”This appears on the overview page after a claim has been submitted for line items that are not required to ship back.
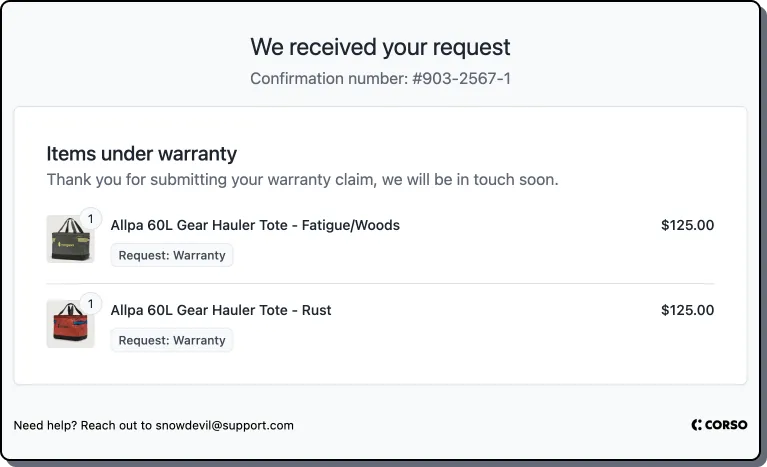
Warranty Submission Text
Section titled “Warranty Submission Text”This appears on the overview page after the claim has been submitted on warranty line items.
How to Setup Text Customization
Section titled “How to Setup Text Customization”Navigate to Settings > Theme > Text Customization