Checkout Plus Setup
Corso Checkout Plus makes it easy to display buyer consent for premium services like delivery protection. This guide walks through setting it up in just a few steps.
1. Add the Checkout Plus Script
Section titled “1. Add the Checkout Plus Script”Start by navigating to the Checkout Plus tab in your Corso Admin Dashboard.
- In the top-right corner, click More Actions.
- Select Add Script from the dropdown menu.
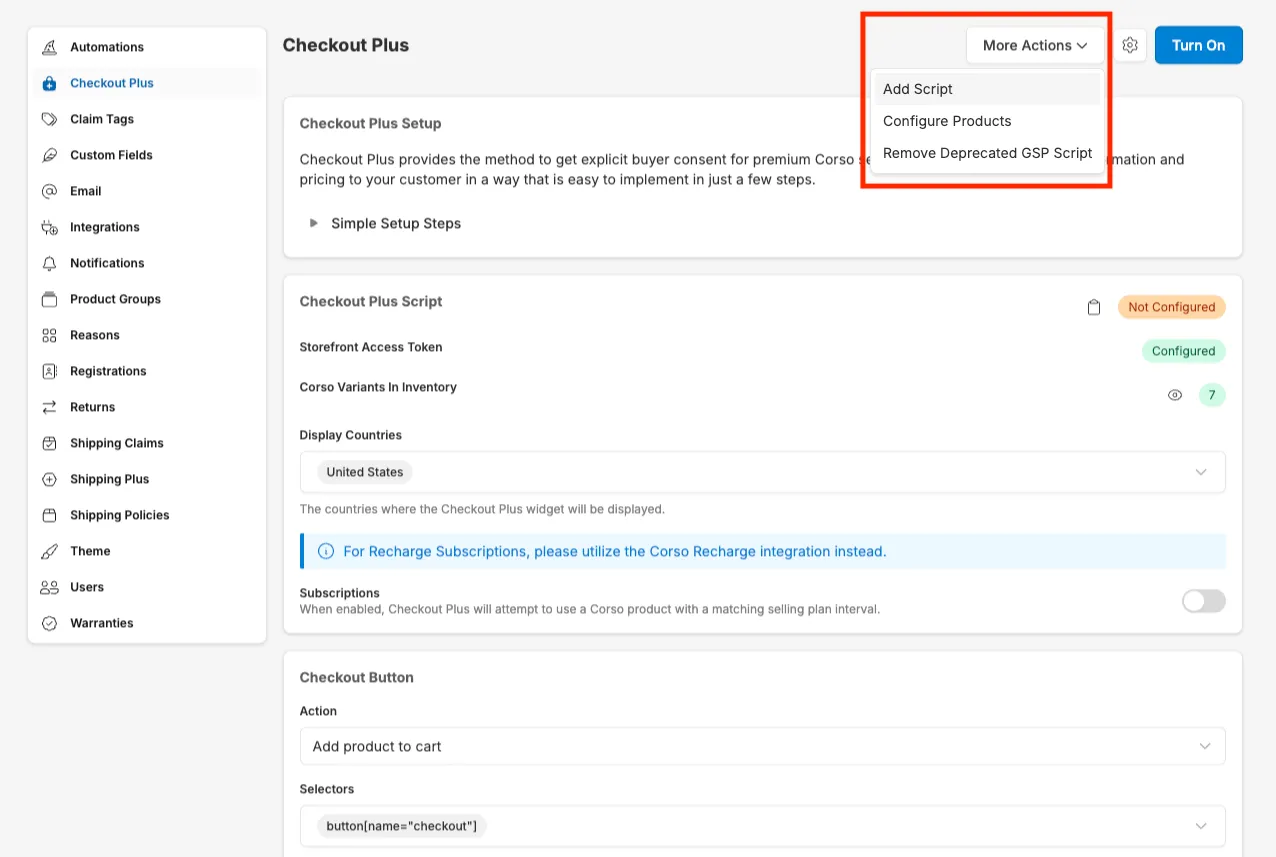
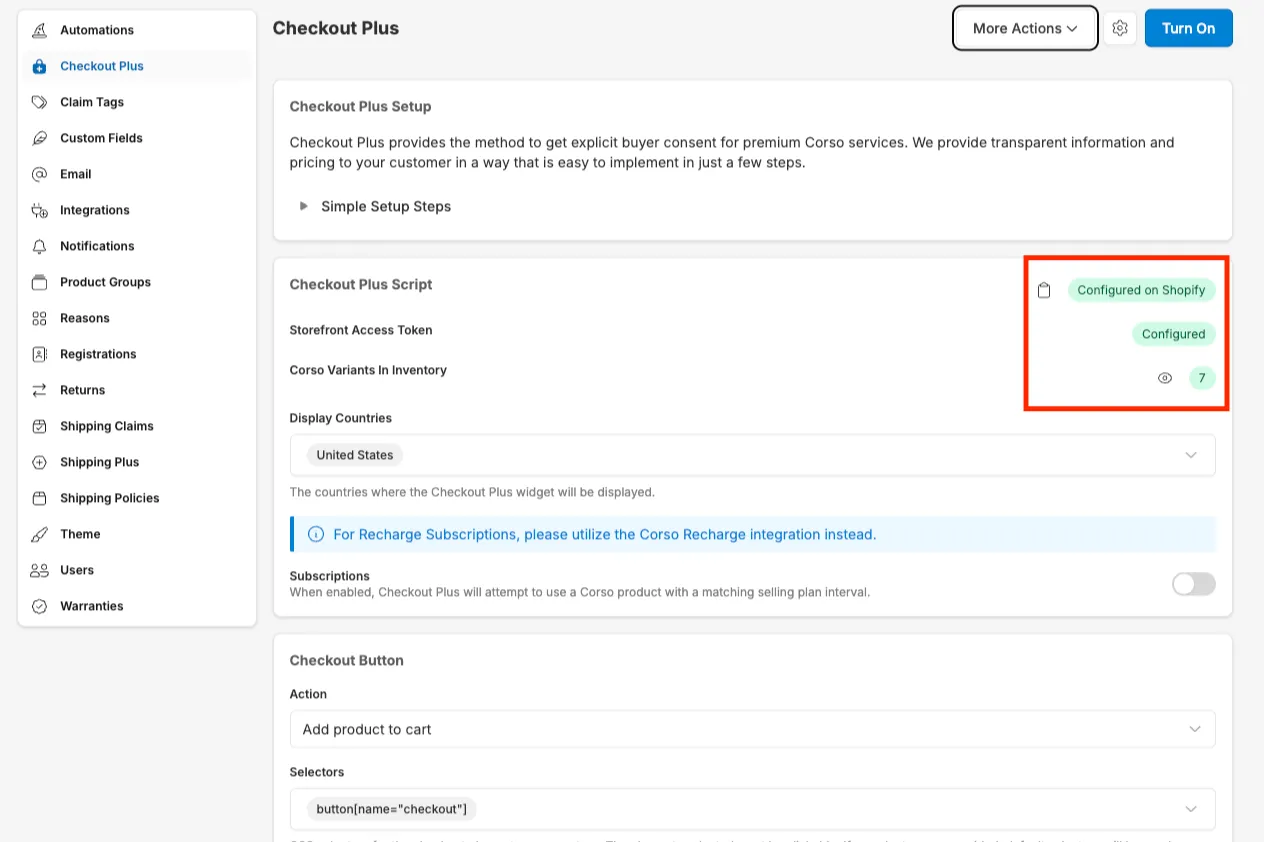
Once added, you’ll see the script status update to Configured.
If you’re migrating from a previous script version, you may also use Remove Deprecated GSP Script to clean up legacy code.
2. Configure Products (if needed)
Section titled “2. Configure Products (if needed)”If your store uses Corso variants in inventory, click Configure Products under More Actions.
This ensures Corso’s Checkout Plus elements are linked properly to your store’s product catalog and inventory.
3. Adjust Checkout Button Selectors
Section titled “3. Adjust Checkout Button Selectors”Next, define selectors so Checkout Plus can attach to your theme’s checkout elements.
- Scroll to the Checkout Button section.
- Under Selectors, add the CSS selector that targets your checkout trigger.
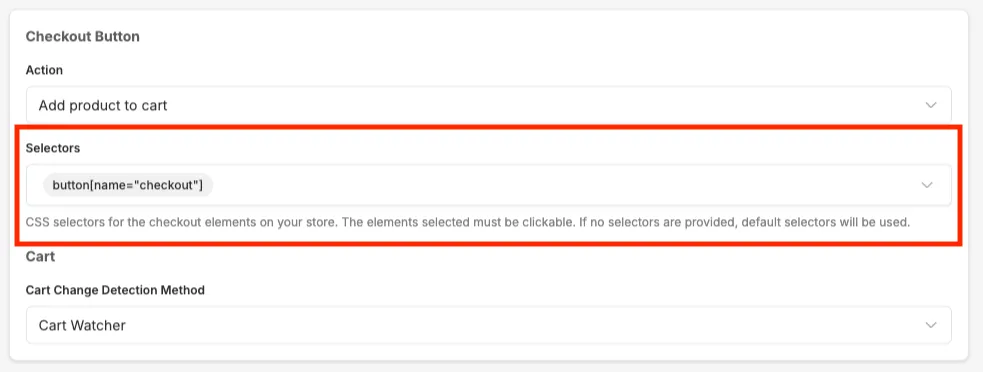
These selectors must be present on your live theme and must reference clickable elements. Corso uses these to track when checkout is initiated.
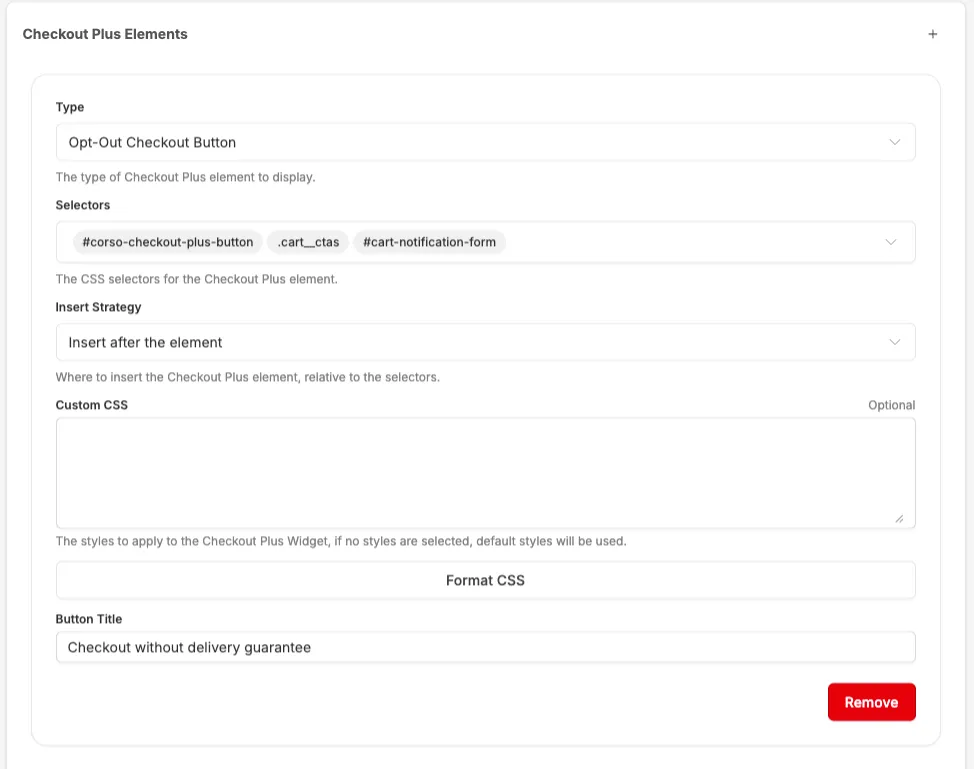
4. Configure the Checkout Plus Elements
Section titled “4. Configure the Checkout Plus Elements”You’ll now configure both elements that power the Checkout Plus experience.
Checkout Plus Info
Section titled “Checkout Plus Info”This element displays the “Checkout + Delivery Guarantee” information, typically above the checkout button.
-
Type:
Checkout Plus Info -
Selectors: Add selectors for placement (e.g.
.cart__ctas,#cart-notification__links) -
Insert Strategy: Controls if the element is inserted before or after the target
-
Optional Fields:
- Title (e.g.
Checkout + Delivery Guarantee) - Description (e.g.
For lost, damaged, or stolen packages) - Image URL (a hosted image)

- Title (e.g.
Opt-Out Checkout Button
Section titled “Opt-Out Checkout Button”This lets customers check out without the added service.
- Type:
Opt-Out Checkout Button - Selectors: Add selectors for the button container (e.g.
.cart__ctas,#cart-notification-form) - Insert Strategy: Leave as default unless your layout requires custom placement
- Optional Fields:
- Button Title (e.g.
Checkout without delivery guarantee)
- Button Title (e.g.
5. Customize with Corso Variables (Optional)
Section titled “5. Customize with Corso Variables (Optional)”You can apply Custom CSS to both elements using Corso’s available variables.
6. Turn On Checkout Plus
Section titled “6. Turn On Checkout Plus”Once everything is configured:
- Click the Turn On button at the top-right of the page
- Verify that the Checkout Plus elements appear in your cart and/or checkout drawer
You’re now fully set up with Checkout Plus!
Still Not Getting the Results You Want?
Section titled “Still Not Getting the Results You Want?”We are always happy to help! Please don’t hesitate to reach out to our support team!